
-------------------------------------
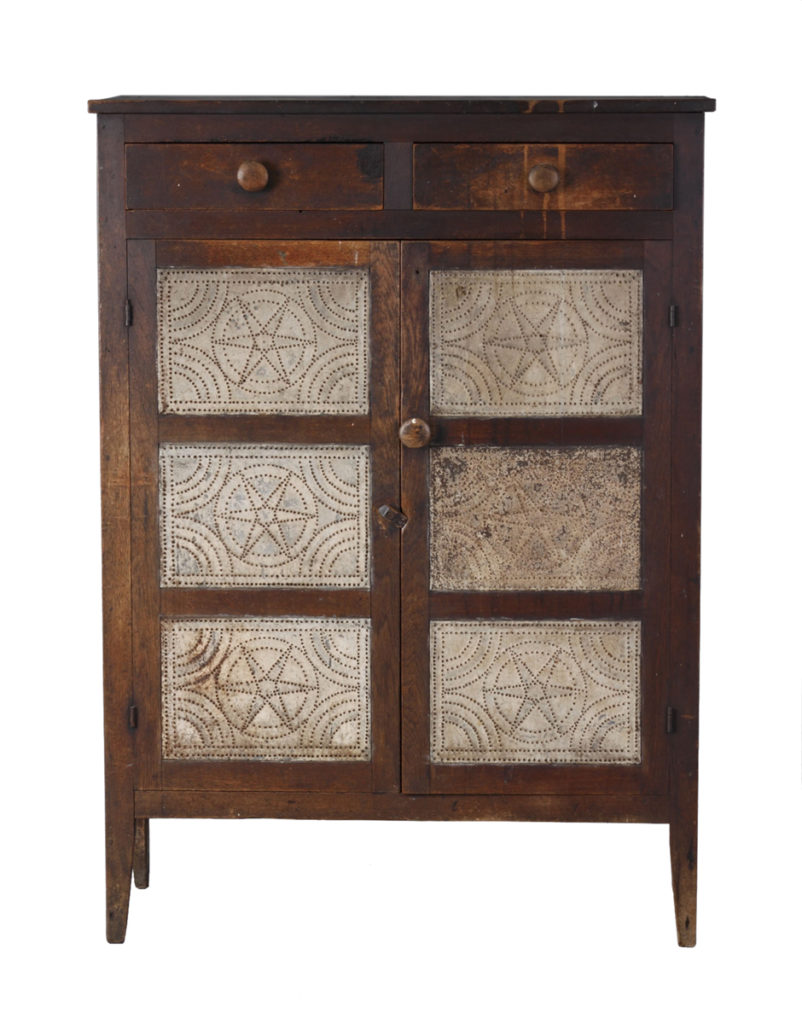
I love the look of antique pie safes! In the 18th & 19th century a pie safe was considered a “must have” item in every American kitchen. Before the advent of ice boxes, people would use a pie safe to store pies, baked goods, and other perishable foods. The shelves were often perforated and the front of the cabinet usually featured punched tin panels to allow air circulation while keeping dust, insects, rodents, and hungry children out of the food. Having air circulate among the food would help keep it slightly cooler to keep it fresh longer. Most pie safes were free standing cabinets, but they also were sometimes hung on the wall.
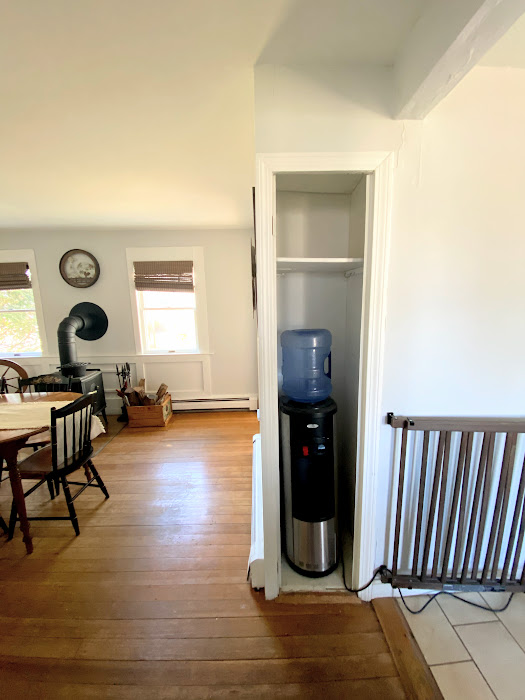
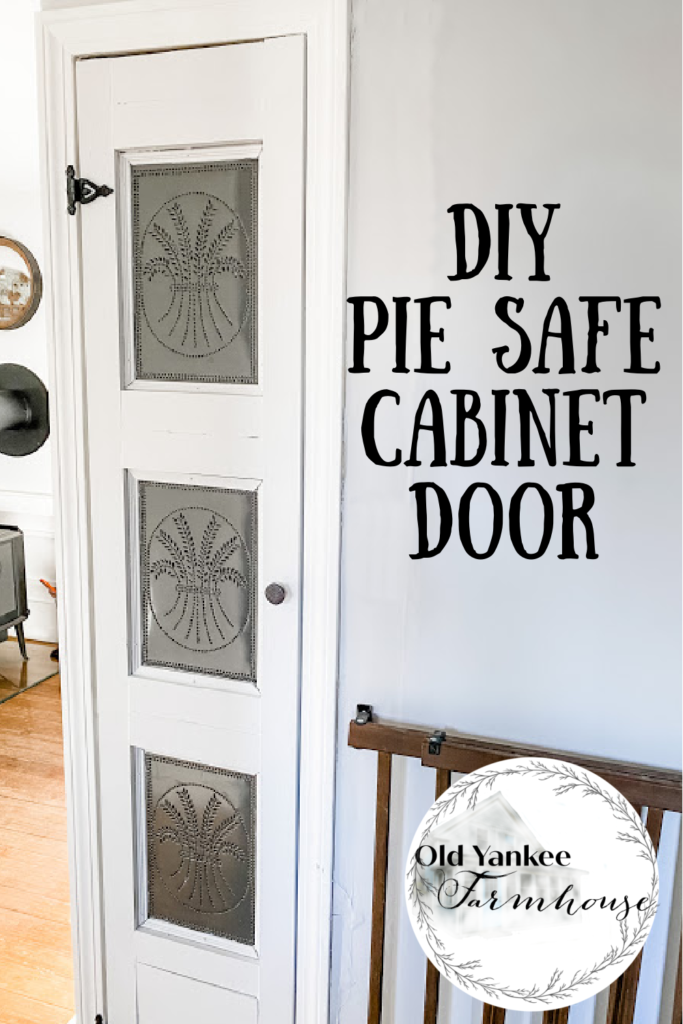
I have a tall built in cabinet in the doorway between my kitchen and dining room. I am not sure what the original purpose of this cabinet was. It doesn’t currently have a door on it, but I can see where there used to be hinges, so at some point there was a door there. We have been using it as an alcove for our water cooler.
I thought this could be a great opportunity to add some historic character to the house by making it look like an antique pie safe! The bonus was that the punched panels would allow air circulation in the cabinet so the cooler doesn’t overheat.
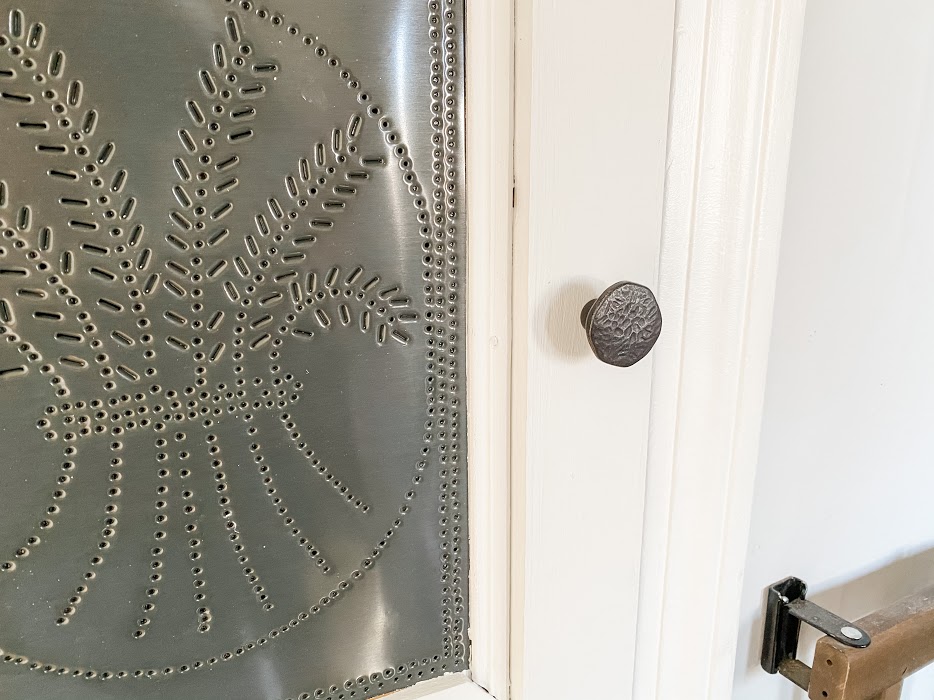
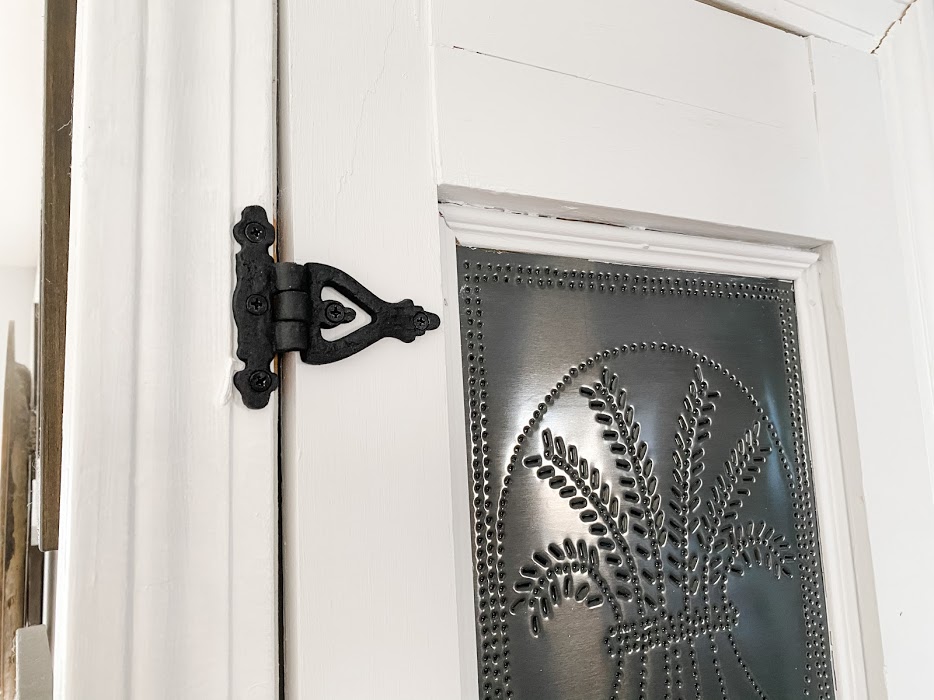
First I needed some punched tin panels. They are not difficult to make on your own, but I decided to go the easy route and buy pre-punched panels. Ebay had lots of options for different designs (click here to see the ones I bought). I went with a traditional harvest wheat design. I ordered some antique looking cast iron hinges and a knob on Amazon.
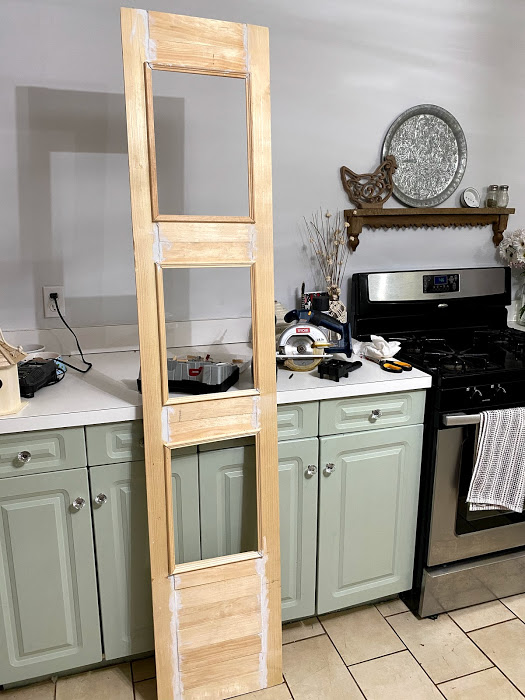
Next I measured my cabinet opening and subtracted out the dimensions of the panels. I was going to need to fill 5 inches horizontally and 32.5 inches vertically. I grabbed my graph paper and drew up a plan. It worked out both measurements were divisible by 2.5 so stacked 1×3 trim board would allow me to fill the space without ripping any pieces.
For lumber all I was going to need was (3) 1x3x8 boards and (3) 8 foot lengths of trim boards.
Time to start assembling!
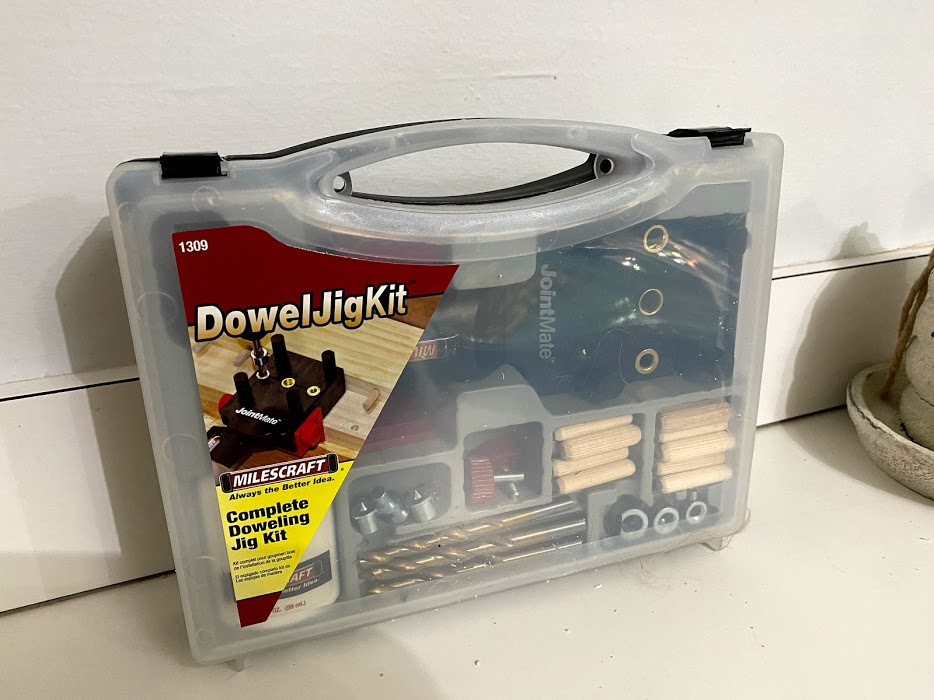
I cut all the 1x3s to size and used wood glue and dowels to connect them.
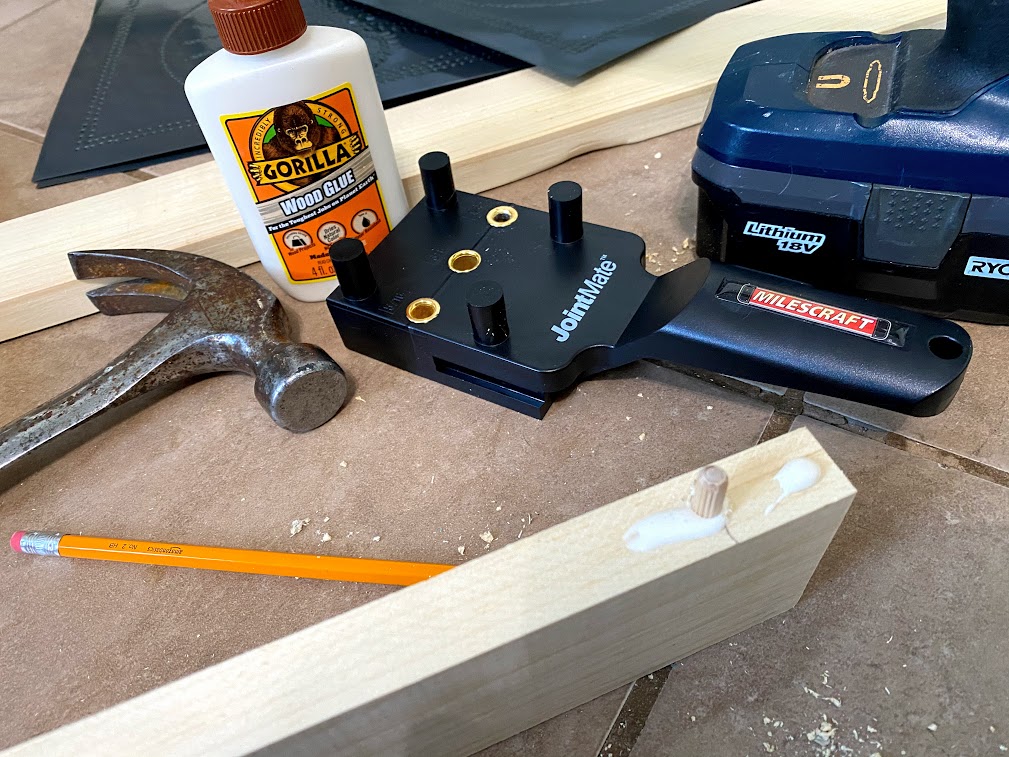
If you have a biscuit joiner, you could also use that to connect the boards. I have a dowel kit that has a tool to help you line up the dowel holes so that they will line up correctly. It also comes with drill bits with stops to help make the perfect dowel holes with minimal measuring.
Once the frame was assembled there were some gaps in the boards, mostly from my non-professional cutting skills. I am planning on painting the door, so I used some wood filler to fill in the gaps. Once it’s painted it will look seamless.
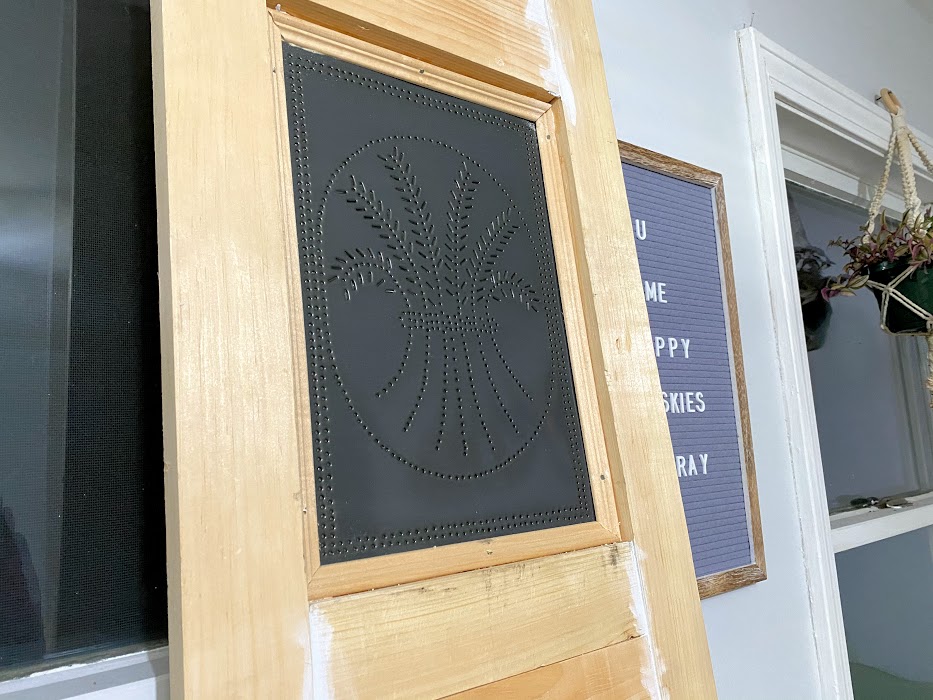
Now that the frame is together, I need to add trim to the back of the holes where the tin panels will go. This trim is added to the surface of the back side of the door and will help hold the panels in place. I used wood glue and small finish nails to attach the trim.
I placed the tin panels in the open panel holes. The punched tin panels have a smooth finished side and a pointy, rough side from where the tin was punched through. Make sure the rough side will be facing the inside of the cabinet.
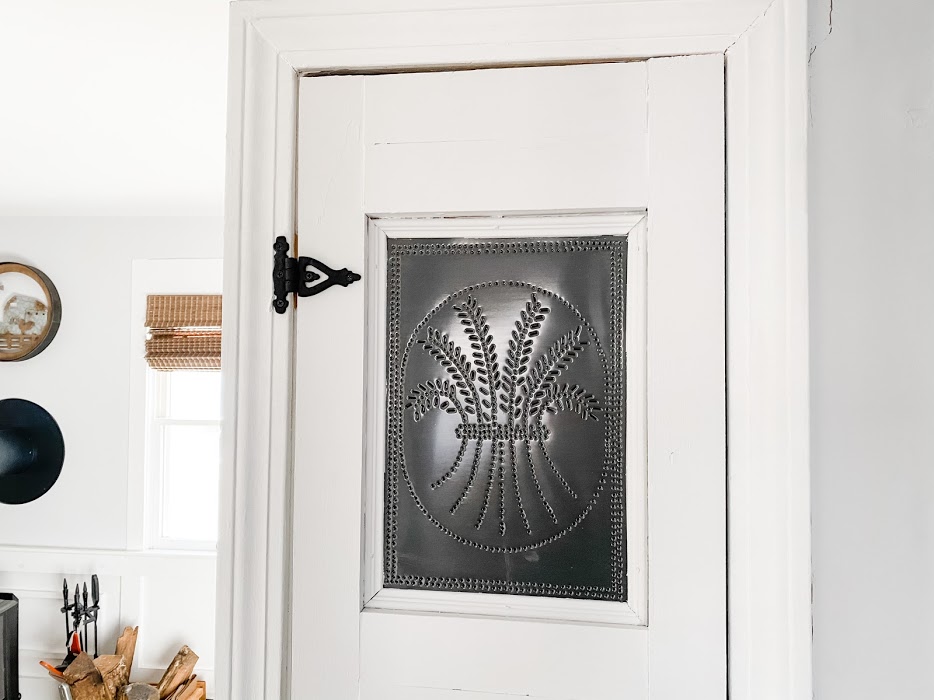
The trim on the back side of the door was installed on the surface of the door to hold the back of the panel. The trim on the front of the door will sandwich the tin panel inside the hole. This will give the tin panels the look of being recessed from the front.
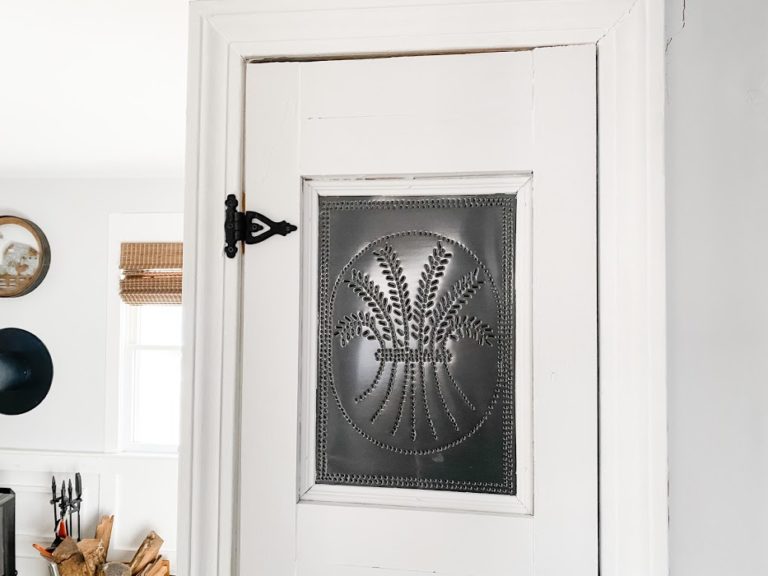
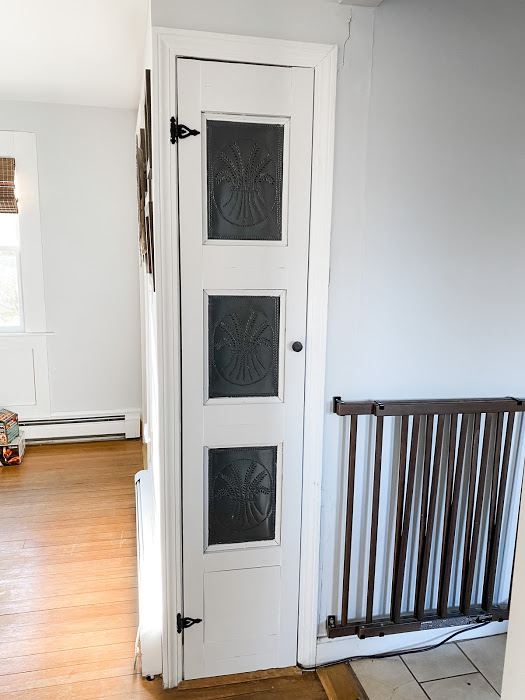
All that is left now is the finishing details! I sanded down the filler and painted the door with Rust-Oleum Chalk paint in Linen White. Once dried, I added the cast iron hinges, door knob, and magnetic clasp and installed it in the cabinet.
The craftsmanship isn’t perfect, but I think that sort of lends to the antique character! I love how it came out and think that it fits perfectly in my antique farmhouse.
Why what a great job you did!
Thank you Nancy! 🙂
Hey neighbor! I love this!!!!
Thanks Karen!! 🙂