
-------------------------------------
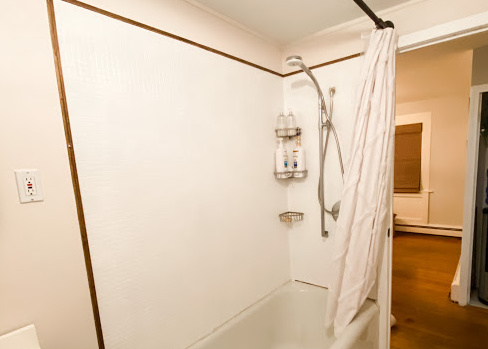
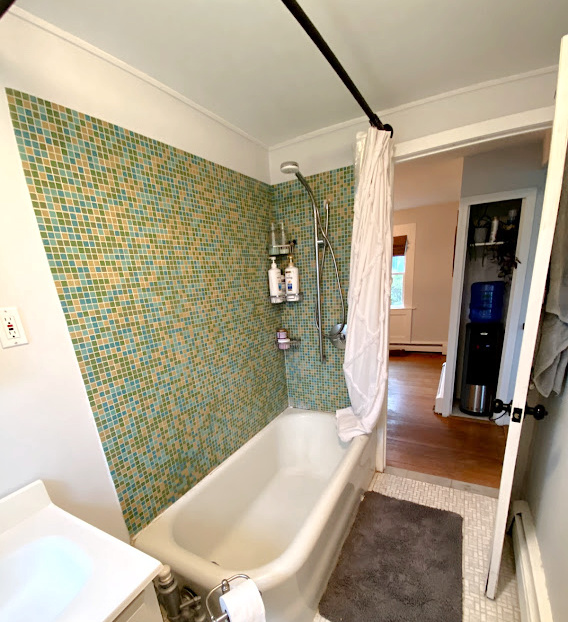
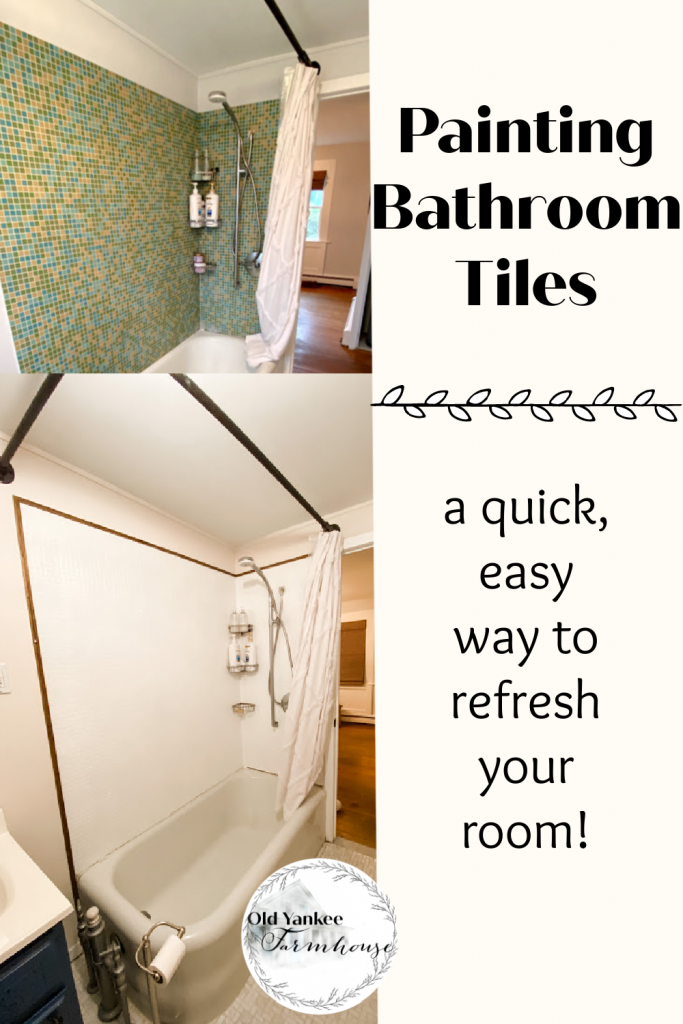
One of the things I was struggling the most with in our bathroom was the shower tile. It was busy and I didn’t like any of the colors in it. Normally, my go to with hiding ugly shower issues is to buy a pretty shower curtain and pretend it doesn’t exist until I have the money to fix it. Unfortunately, the configuration of our main floor bathroom didn’t allow for hiding ugly tiles without making the bathroom feel claustrophobic. While I someday want to replace the surround with some nice tiles, it is not in the budget for now.
Want to check out the full $600 makeover of this room? Click here!
I needed an easy and inexpensive way to update the tiles for my bathroom refresh.
I looked into adhesive backsplash options. I loved this idea because I could totally change up the look of the tile. I could not find one that was rated for shower surrounds. They work great in the kitchen as a backsplash, but aren’t meant to stand up to the streams of water in the shower.
Finally I landed on my old trusty friend, paint. Paint is the magic wand in every thrifty DIYers tool belt. It’s inexpensive, easy to do yourself, and has the power to totally transform any space.
I have painted walls, ceilings, floors, furniture, cabinets, even hardware and pipes, but I had never painted tiles.
I read a bunch of reviews and tips and tricks. It sounded like the perfect solution. I went with Rust-Oleum Tub And Tile Refinishing 2-Part Kit. This epoxy & acrylic product is made for just this kind of project. The finished product is so water proof, you can even paint a tub with it (I might need to buy some more for the avocado green tub in the kid’s bathroom!).
A common thread in reviews I read was the need for ventilation in the area. I CAN NOT stress this point enough. There is no two ways around it, this stuff smells. It smells bad, it smells strong. I thought I would be ok with just having the bathroom window open and the bathroom exhaust fan going. I was wrong. Very soon after starting I realized this. I went and got my chemical fume mask I use when making soap and my strongest box fan. I put the box fan in the bathroom doorway, on high, blowing the fumes towards the open window. I also opened all the windows in all the adjacent rooms because the smell was already super strong in most of the downstairs.
Top Tips:
*Assemble everything you need ahead of time. Once you have mixed the epoxy & acrylic you need to use it all within 6 hours (including second coats & touch ups)
*Paint on a nice day when you can have as many windows open as possible
*Have a powerful fan moving fumes outside
*Wear a mask & disposable gloves.
*Use a roller for a smooth finish
*Work quickly and take a break if you start to feel dizzy
Let’s Get Started!
Assemble your tools
*Rust-Oleum Tub & Tile Kit
*small 4 inch roller with a short nap
*disposable paint tray
*stir stick
*face mask & disposable gloves
*portable fan
*scrubby cleaner (like Comet or baking soda)
*painter’s tape
*400 or 600 grit wet/dry sandpaper & cloth

Step 1 – Prep the area
Before painting, you need to properly prep the tile. Don’t skip the preparation step, it will directly effect the quality and longevity of your project. If you have mold, bleach it, if you have lime scale, use a product like Lime Away. If you have no major issues, simply use a scrubby cleaner like Comet or baking soda to clean away any grime or soap scum.
Gentle scruff up the surface with a 400 or 600 grit wet/dry sandpaper. Rinse the tiles clean, let dry, go over with a dry cloth.
Tape off any adjacent areas with painter’s tape to protect nearby surfaces
Step 2 – Prep yourself
Open as many windows as possible. Turn on the bathroom exhauset fan if you have one. Set up a fan to direct fumes outside.
Put on your gloves & mask.
Step 3 – Coat One
Open both the paint & activator cans, stir both well separately. Then mix the activator into the paint.
Pour about half the can into your paint tray.
Roll on the paint. You will notice the paint is slightly sticky, so try to not go over an area too much. Keep a wet edge as you are rolling.
Keep an eye on how you are feeling, if you feel dizzy, leave the area and sit down for a couple minutes.
Once you have the first coat down, you will need to let it dry for an hour. Keep in mind that once this paint is mixed with the activator, it has to be used within 6 hours, so don’t wait too long! Leave your fan & exhaust fan running and windows open.
Step 4 – Coat Two
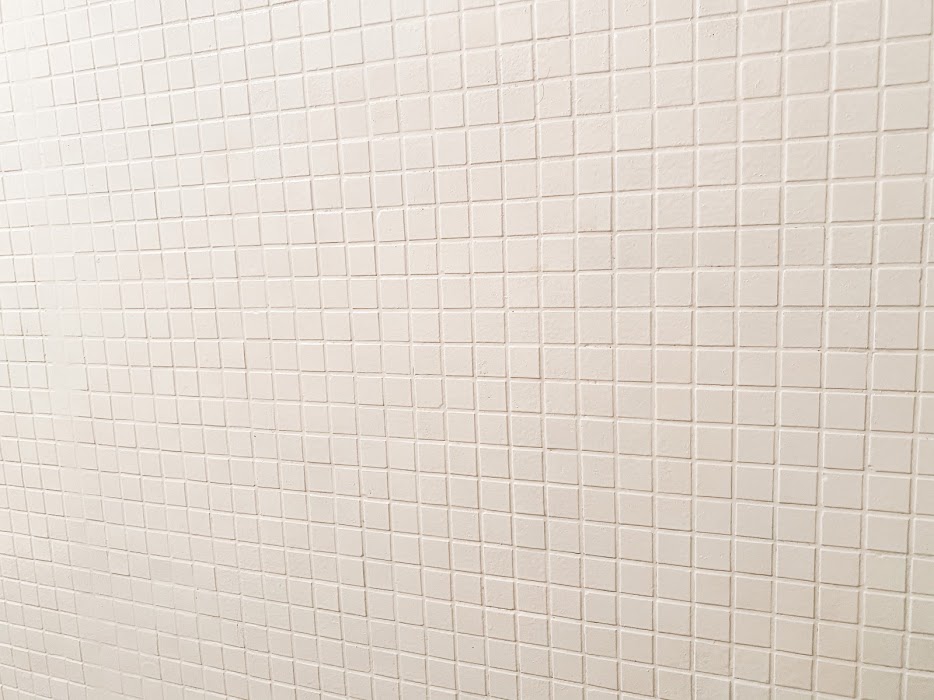
If your tile is white, you might be able to get away with one coat. I had some dark greens & blues that required a second coat.
Roll on your second coat. This kit was enough for me to do two full coats on my two shower walls with a little extra, but not enough for a third full coat. If you have a large area or really dark tiles you might need a second kit.
Step 5 – Clean Up & Enjoy!
Pull up the painter’s tape. Grab a trash bag and tossed the tape, unused paint, tray, and roller cover and immediately get these smelly things out of your house!
The paint needs to cure for three days before using the shower. The smell from the tiles was still lingering on day 3. We kept the fans on for about 8 hours and the windows open for about 24 hours. It smelled in the bathroom for about 5-6 days but it was TOTALLY worth it!
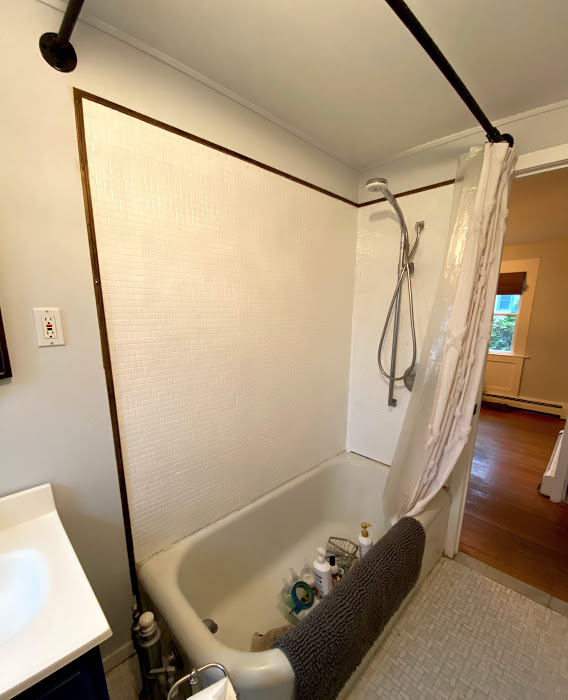
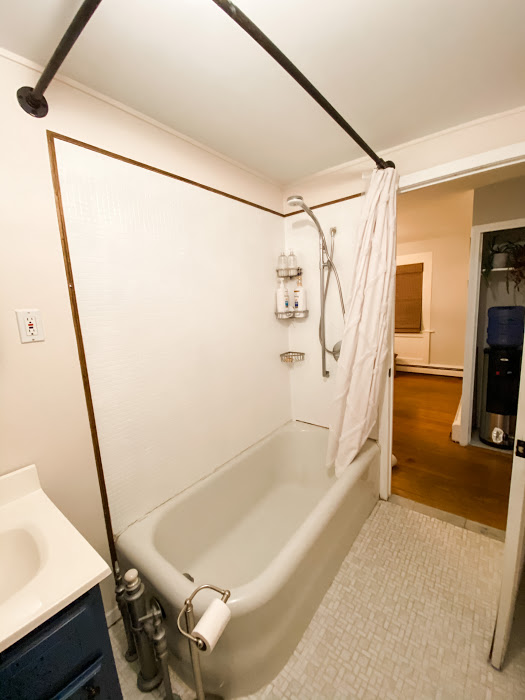
Final product
Yes it was smelly, yes I complained about it the whole time haha. But I can not believe how great the tiles came out. The whole room is brighter and cleaner looking. The tiles are holding up great and are very easy to clean. I still want to replace them someday but that project has moved way down on my list now – and it cost under $30! Here’s the finished project, I painted the walls a creamy beige and added some wood trim to frame the tiles.
What do you think? Have you tried painting tiles?
Hello there!
I’m wondering about the grout.
Our grout is getting pretty worn down and I wondered if this product would take care of that along with refreshing the tile.
Thank you!
Beth in Indiana 😊
Yes! I used a small roller to paint right over both the grout and tiles