-------------------------------------
One of the priorities for my old house is to try to restore some of the historic charm that has been stripped away over the decades. It’s the small details that can add up to the overall feel of a home. Having dated door knobs and hardware instantly gives off the feel of a home that needs updating.
At some point, I want to replace all the interior and exterior doors with some nice solid wood 5 panel doors. Given the age of my home, I believe that is what would have been here originally.
Replacing the doors is not in the budget right now, but I can swing replacing the hardware! Someday when I do replace the doors, I’ll already have the hardware ready to go.
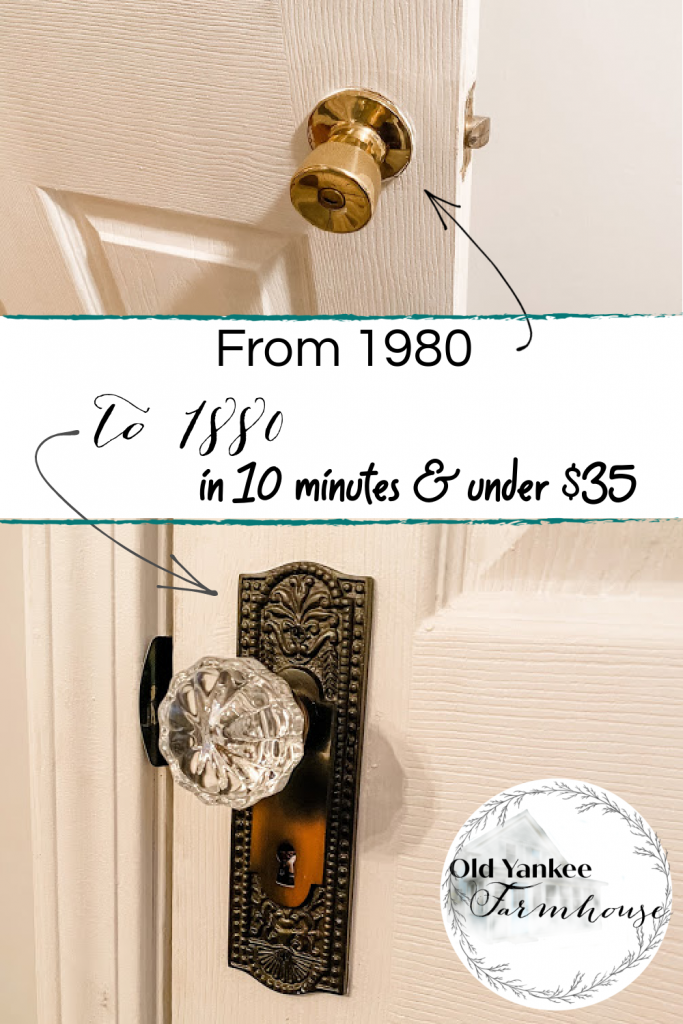
This is where we are starting:
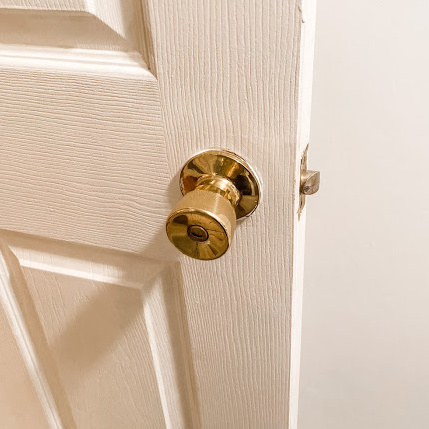
About 75% of the door knobs are shiny brass tulip knobs. There are some random round ones. There are a few bronze ones. It’s sort of all over the place.
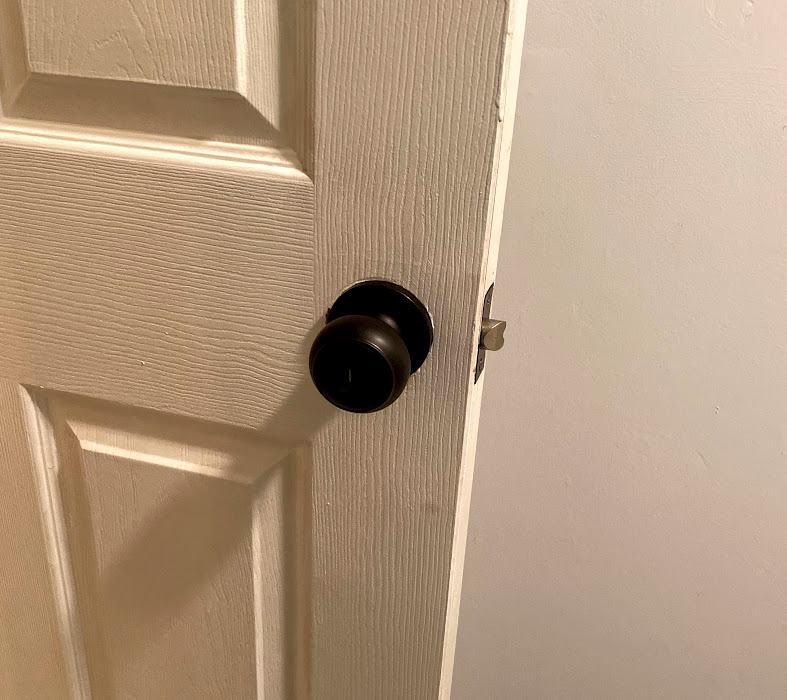
For most of the door knobs in the house, I just went with some nice modern, round, matte black knobs. Nothing fussy, nothing too fancy, but they look so nice against the white doors! It’s a really easy fix you can do yourself and makes a big impact. I didn’t have the budget to replace all the hinges right now, so I used Rust-Oleum enamel paint in satin black to paint them. It was easy and only $10 for all the doors.
But I wanted to do something special in the dining room. The dining room is the central room in the house. It is one of the few rooms that still has most of the original trim and has the original hardwood floors.
When I say it is the central room – it is the very hub of the house and nearly all the rooms on the first floor spoke off of it. Off the dining room is a bedroom, kitchen, bathroom, office, living room, front hallway, and there is a closet.
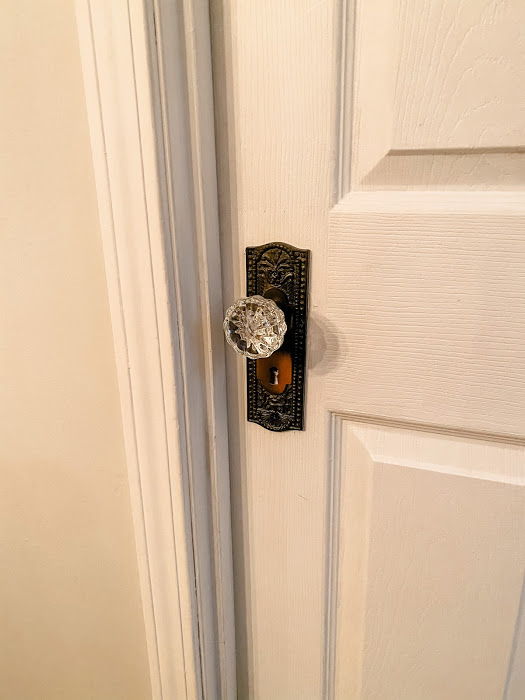
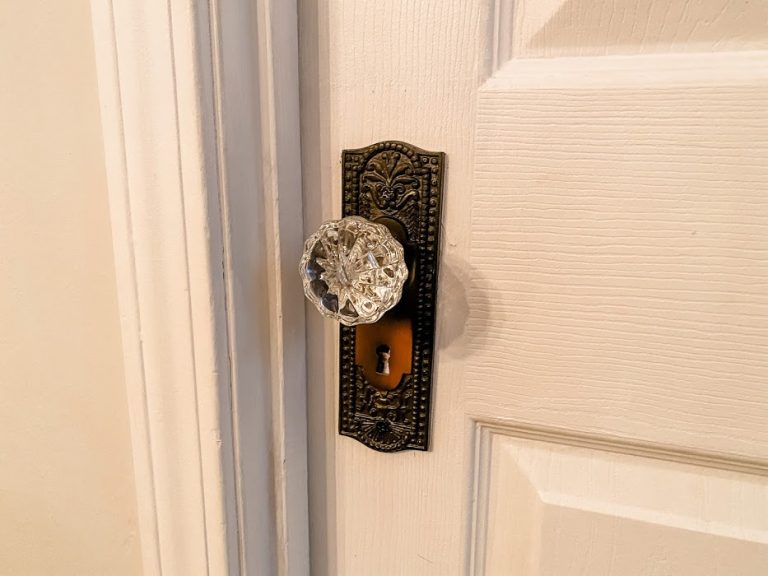
Four of these rooms have doors and I wanted to do something a little special for the hub of the house. I love the look of old door hardware with the backplate and huge mortise faceplate with keyhole. I wanted to find a way to do this without the construction hassle of installing a mortise with key lock. Sort of faux historic.
My husband thinks it’s silly that I am “updating” our outdated door hardware by installing something that looks even older. 1980s old is ugly, 1880s old is classic – it’s totally different haha! You get me right?
I had this awesome idea to put the pieces together with a mortise lock look but with using the existing latch assembly & faceplate.
These are the pieces I’ve assembled:
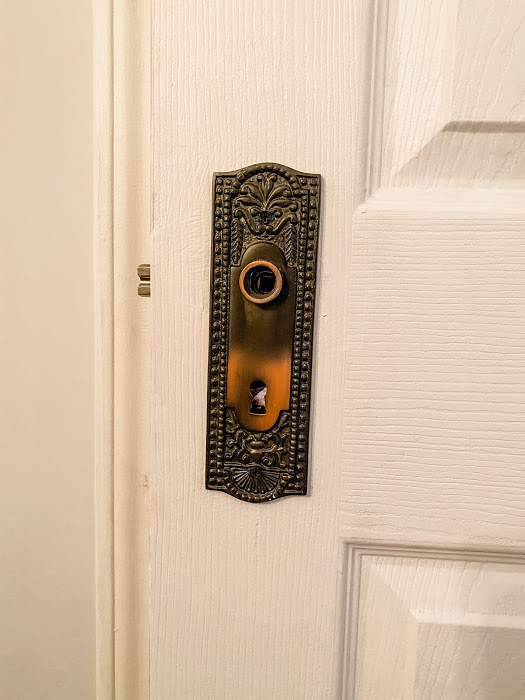
Beaded Door Back Plate with Keyhole in Oil Rubbed Bronze
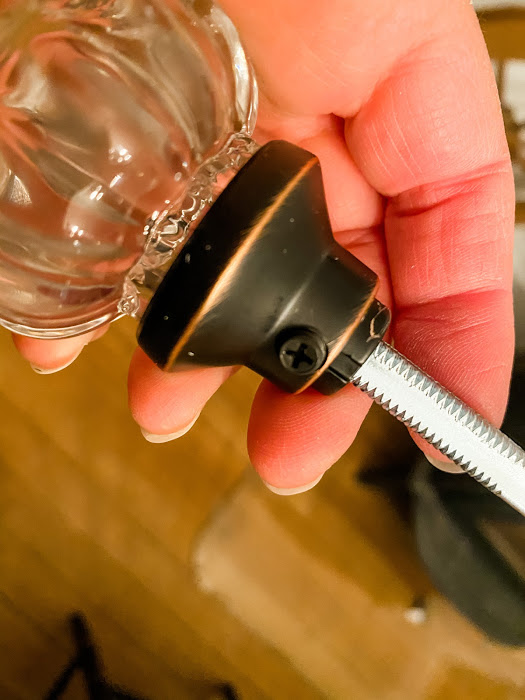
Bronze Mortise Style Fluted Glass Knob Set (comes with two knobs & spindle)
2.5 inch Door Knob Rosette in classic bronze

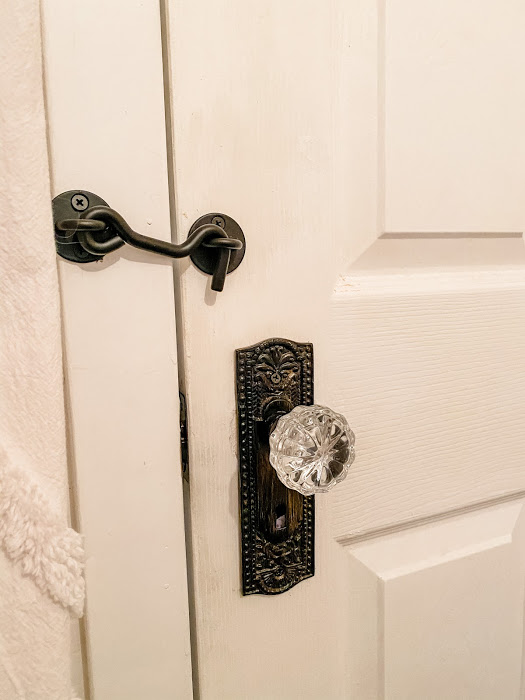
In this setup, the fancy backplate will just be on one side of the door. The other side of the door will just have the rosette. The doorplate is $20, the rosettes are $6 for two, it’s purely a budget thing. I decided for the closet, bedroom, & office door I would have the rosette on the inside and door plate on the outside. For the bathroom I splurged on a nice door plate on both sides because people spend a fair amount of time in here with the door closed, looking right at the door.
Installing the doorplate & knob
Step 1 – Remove the old door knob. It depends on the model door knob you have, most have two screws on one side of the door, some have a pin underneath the knob. Get the knob off, but leave the “guts” (the latch assembly & latch faceplate) installed in the door
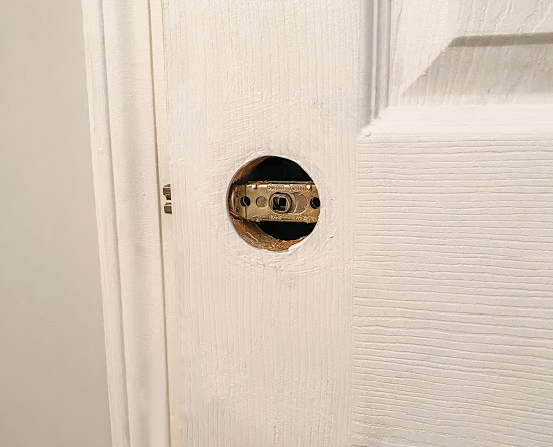
Step 2 – Hold the backplate over the hole to see how it will fit. The backplate I used was 2.25 inches wide which covered the hole, but I did need to sand and do a quick paint touch up around the edges.
Step 3 – If your door is a light color and your backplate has a keyhole, you will want to put something behind the backplate where the keyhole is. I decided this was an opportunity to add something fun! You could just put a black dot on the door… but I am a little extra.
I love kids. I love the magic of childhood. My four kids are older teens/young adults but I hope someday I’ll have grandkids running around. I have little nieces and nephews that visit often. What could be more fun than finding a magic world beyond the keyhole? I printed out a picture of four of our farm animals on a black background, about the size of a quarter. A glue stick was used to glue the photo to the door in the correct place. You can’t see it from afar because of the black background, but any little ones that peek into the hole will have a little surprise! Want to do the same? Click below for a free printable!
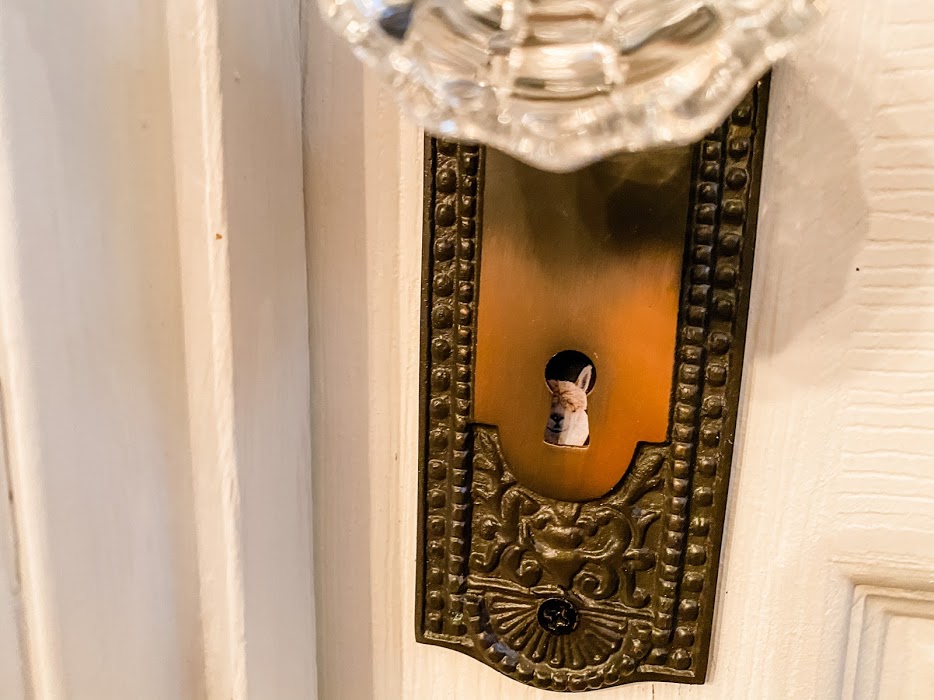
Step 4 – Attach the faceplate to the door using provided hardware. I was a little concerned because my doors are hollow core but they seem securely attached. If yours seem loose, you could add a little construction adhesive behind the plate. Center the spindle hole in the door plate so that it lines up with the spindle hole in the latch assembly.
Step 5 – Loosen the screw at the base of the glass knob and screw in the spindle. Tighten the screw again to secure the spindle.
Step 6 – Insert the spindle through the door plate spindle hole and through the door latch assembly
Step 7 – Slide the rosette over the spindle on the inside of the door. Here is a bit of an issue. Unless your door is brand new, you probably have a big hole in your door, leaving no where to screw the rosette into. You could fill the hole with wood scraps or wood filler. I decided to just use the tension of the door knobs being screwed together to hold the rosette in place. So far it is nice and tight against the door. I’ll update the post if anything changes!
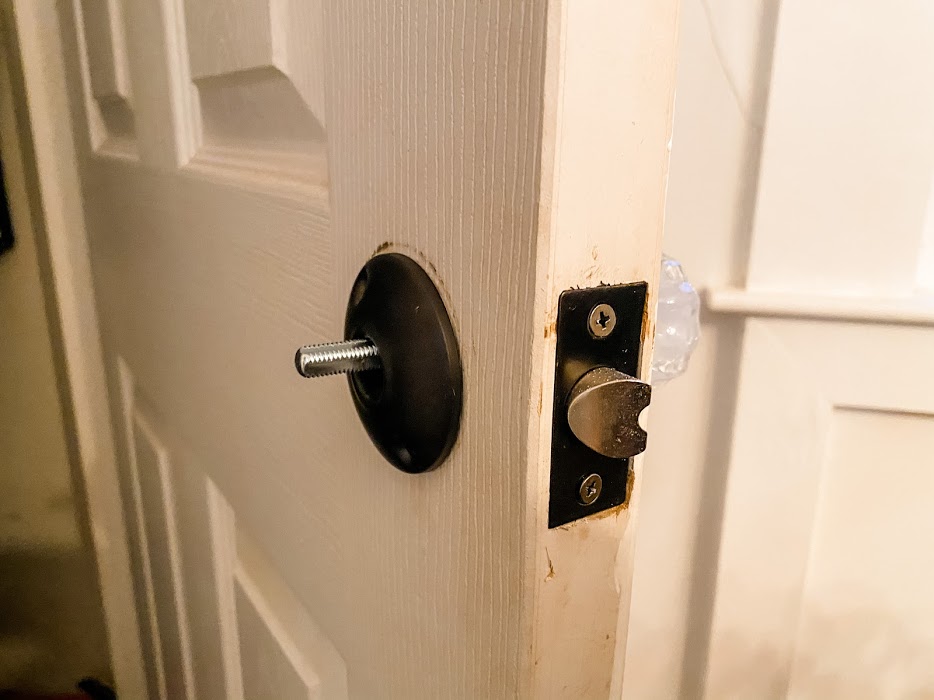
Step 8 – Loosen the screw on the remaining glass knob and screw it onto the spindle. You want to screw it on to just the right spot. Too tight and the latch assembly won’t turn, too loose and your knob will be jiggly. Test it by turning the knob and ensure it moves freely. Once you get it in the right place, tighten the screw at the base of the knob
That’s it! Now enjoy your historic look door knobs!
One safety note – These knobs are glass, if they fall or get hit hard, they will shatter and possibly hurt someone. If you think this will be a problem in your household, you might want to find a composite or metal door knob option.
Do you have a room that needs a little privacy? Glass knobs typically don’t come with locking mechanisms. For our bathroom, we ordered a chunky black eye hook to make our guests more comfortable.

I have the exact same doors and knobs! I used plainer backplates but I love yours. Thanks for posting.
Awesome! I love how they came out
I love everything about this!! Gorgeous! I love the hidden alpaca too. ❤️
So happy to read this and find a way to use my old glass knobs.