-------------------------------------
We have one of those houses where no one uses the front door. Many, many years ago the road used to run right in front of our house and the driveway was off to the side. Perhaps they used the front door then? Eventually the road was dead ended, a park was built and the driveway moved to the back of the house.
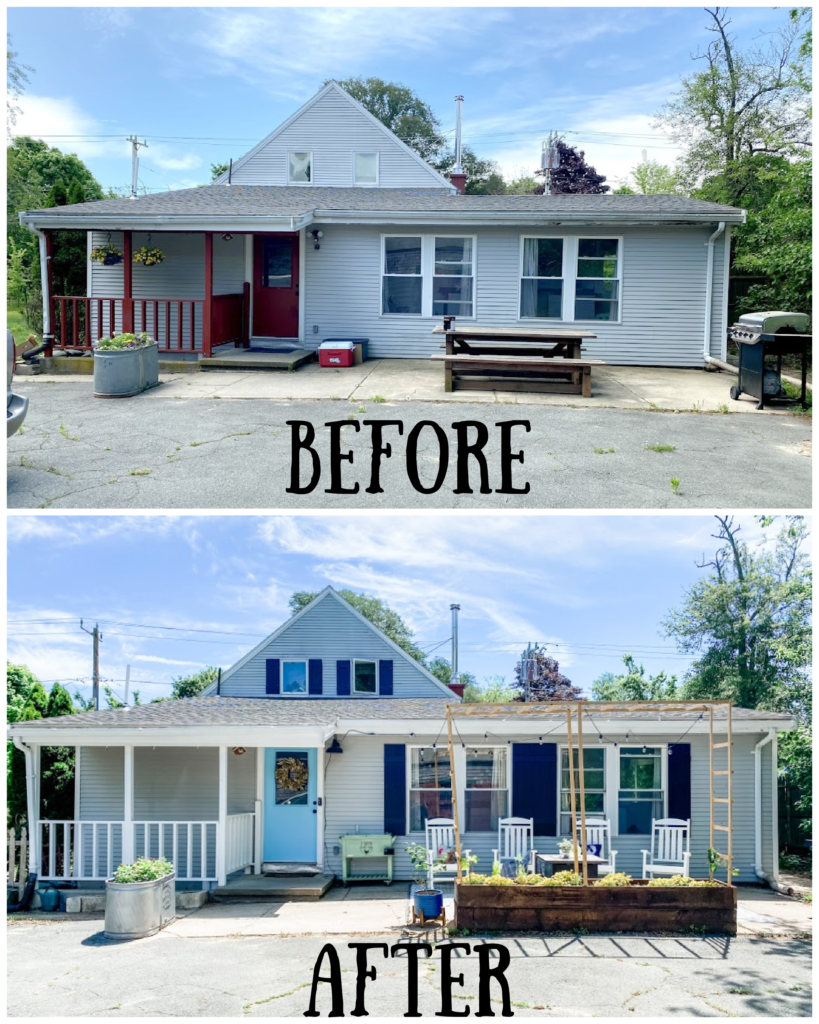
A concrete patio was added along the entire back of the house, and it ran right into the driveway. When we first looked at the house, the back view of the house nearly made me want to walk away. The entire back was concrete and pavement. So much hardscape was not a welcoming first impression.
This is the view from when we toured the house for the first time
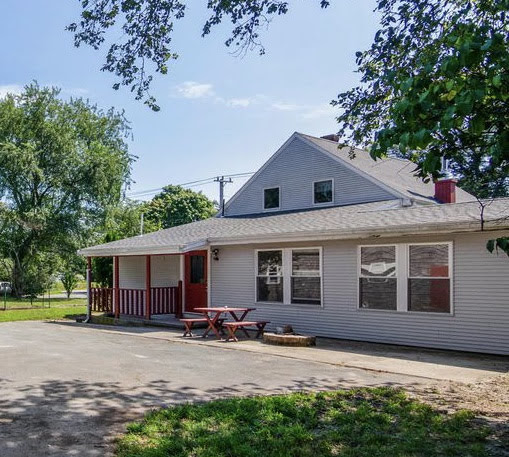
I knew it would need a major curb appeal boost!
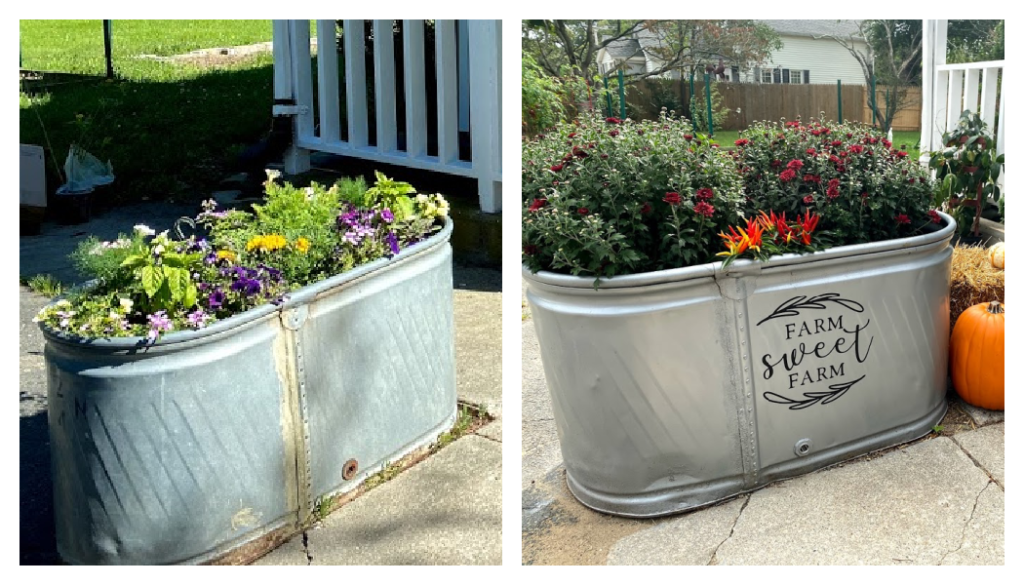
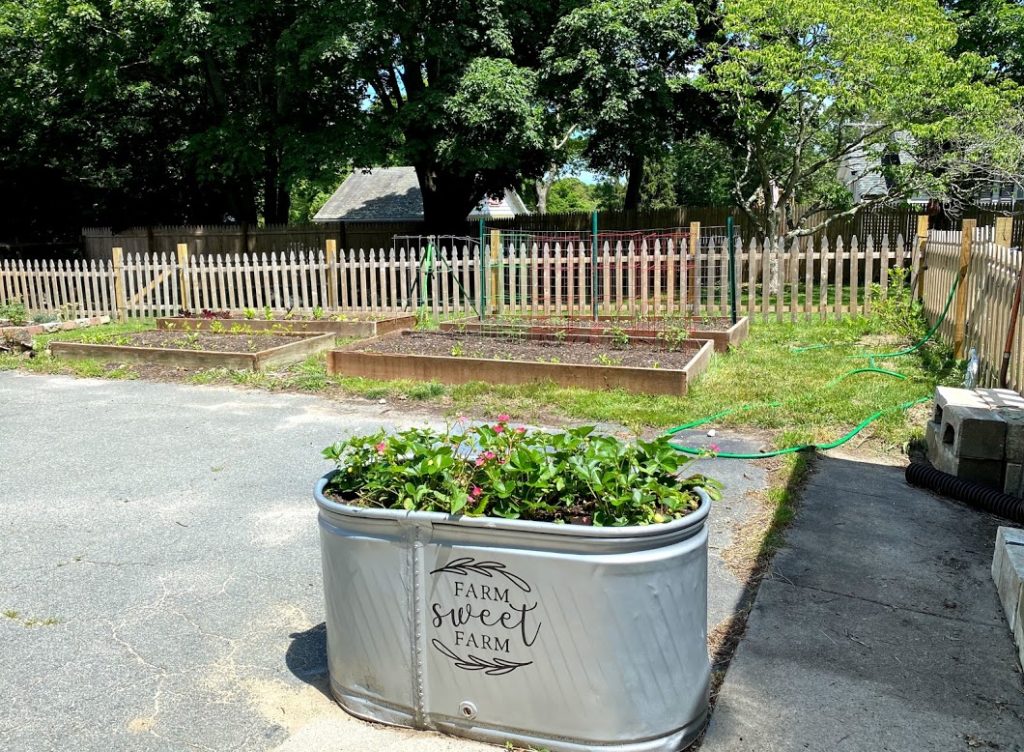
We pulled an old metal stock tank that was left in the barn and positioned it as a planter. It’s cute & farmy and helps define the “walkway” to the back door. I ordered a sweet vinyl decal from Etsy and used a metal spray paint to get rid of the rusty spots & bring the stock tank back to life.
The overhang and the red paint on the railing & door really made the door area very dark. I painted the gutter, trim, and railing in “Ultra Pure White” by Behr. The back door was painted in a happy, bright blue – “Bengal Blue” by Behr. It really brightened up the entrance and made it much friendlier!
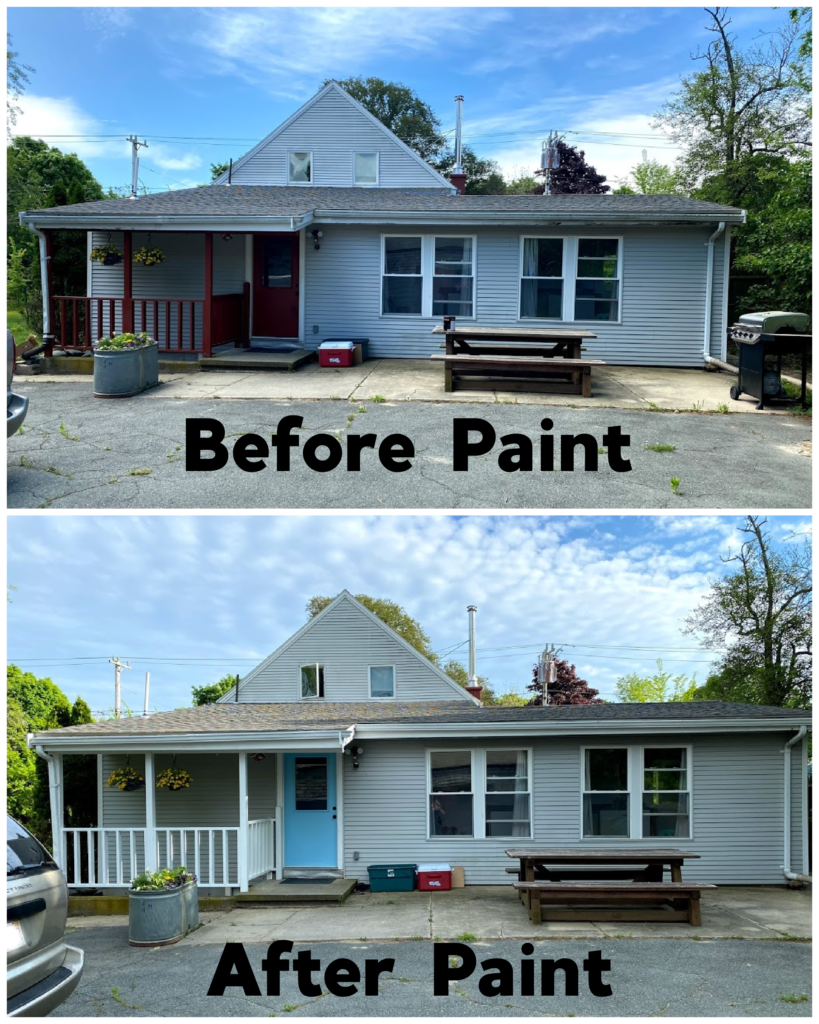
It never fails to amaze me how transformative paint can be. It’s such an affordable and easy to DIY change for homeowners to make. Nothing else gives you the same bang for the buck!
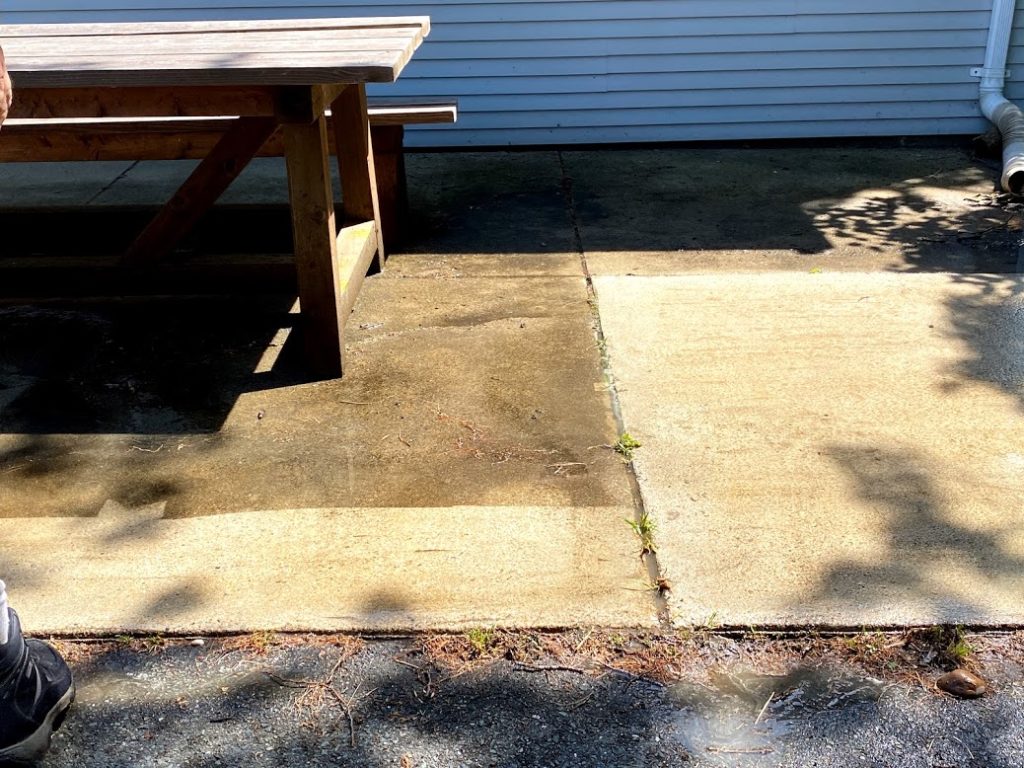
Next up, powerwash the concrete patio. The previous owners had a firepit ring directly on the concrete. So not only was there ash, there was just a lot of dirt. I was blown away the difference this made. Another easy & affordable change!
The next change I wanted to make was to really define the patio area. One of my biggest hang ups when buying the house was that I hated that the driveway met up to the patio and basically just made the whole area between the house & barn feel like a parking lot. It was not welcoming and I certainly didn’t want to spend any time on the patio.
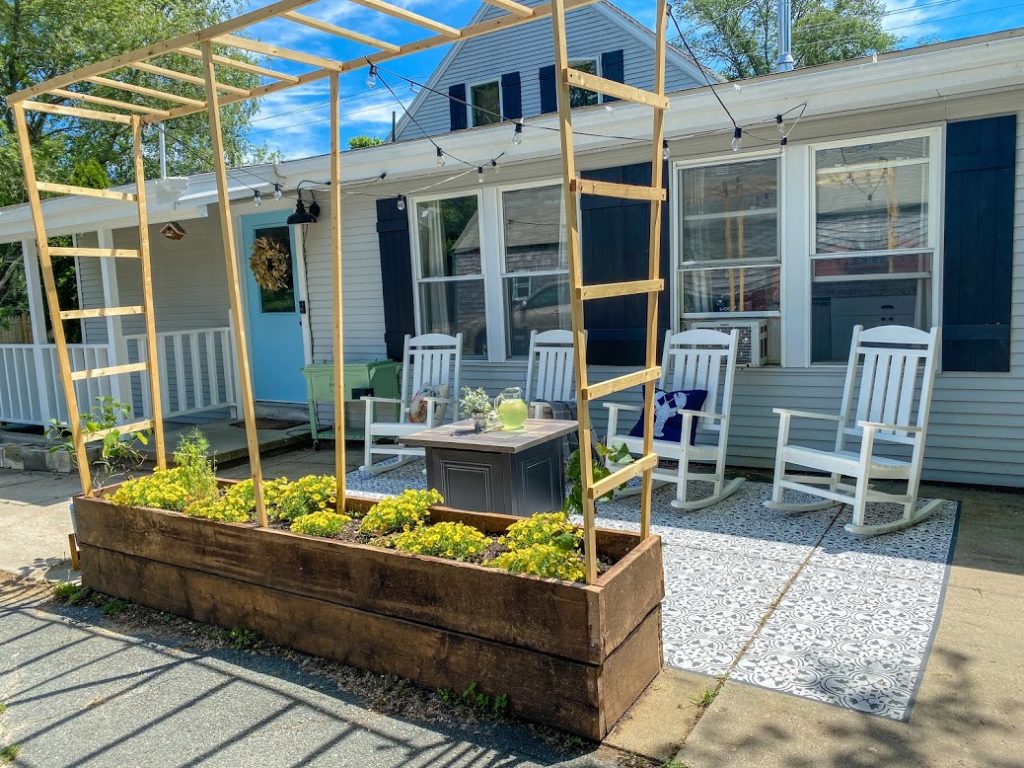
Luckily we had taken down some stall partitions in the barn. I used the nice thick lumber from the partitions to build some raised beds in the garden, but I made sure to save some for a double high planter at the edge of the patio. The lumber was already stained and nicely aged. To make the double height planter we just made two boxes, stacked one on the other and then added some braces to connect them on the inside.
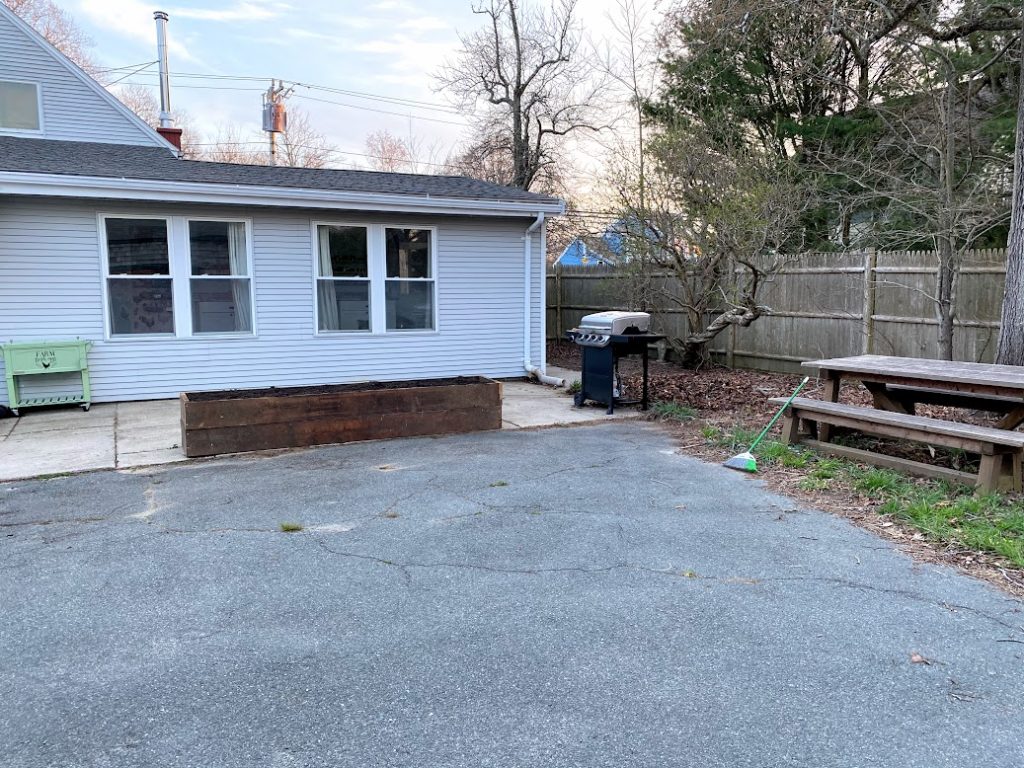
The picnic table is something I wanted to keep because we use it for outdoor dining and parties, but I had better plans for the patio. We moved the table and benches off to the grassy side area. Still convenient to the grill for backyard BBQs but not the focal point of the back of the house.
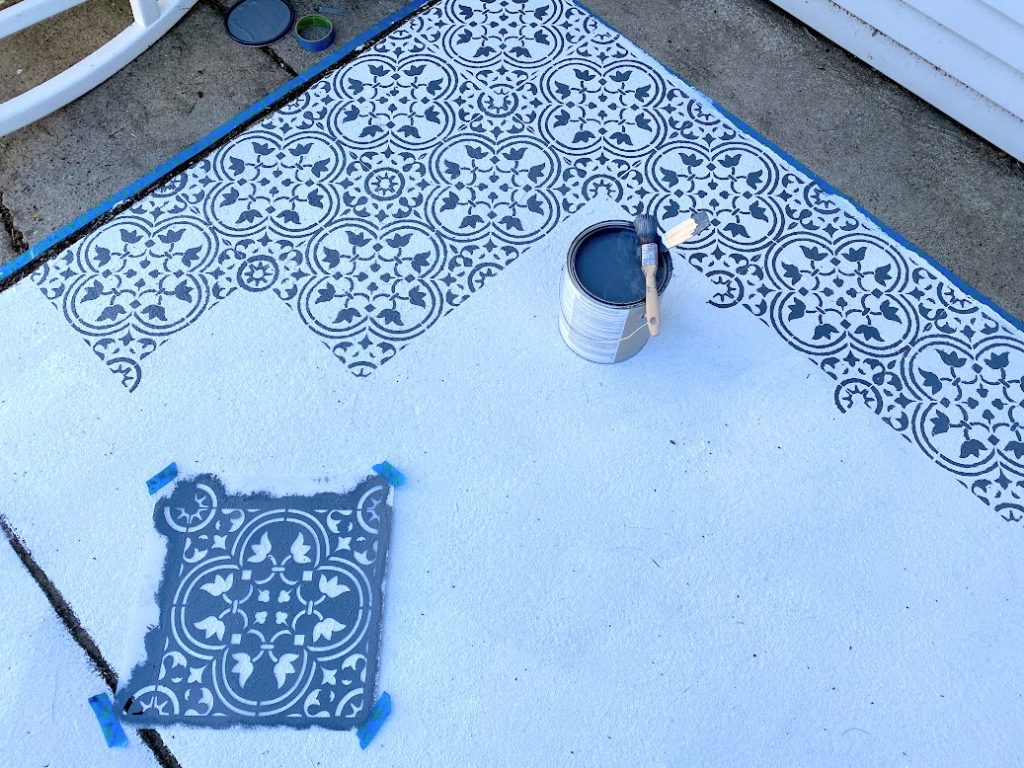
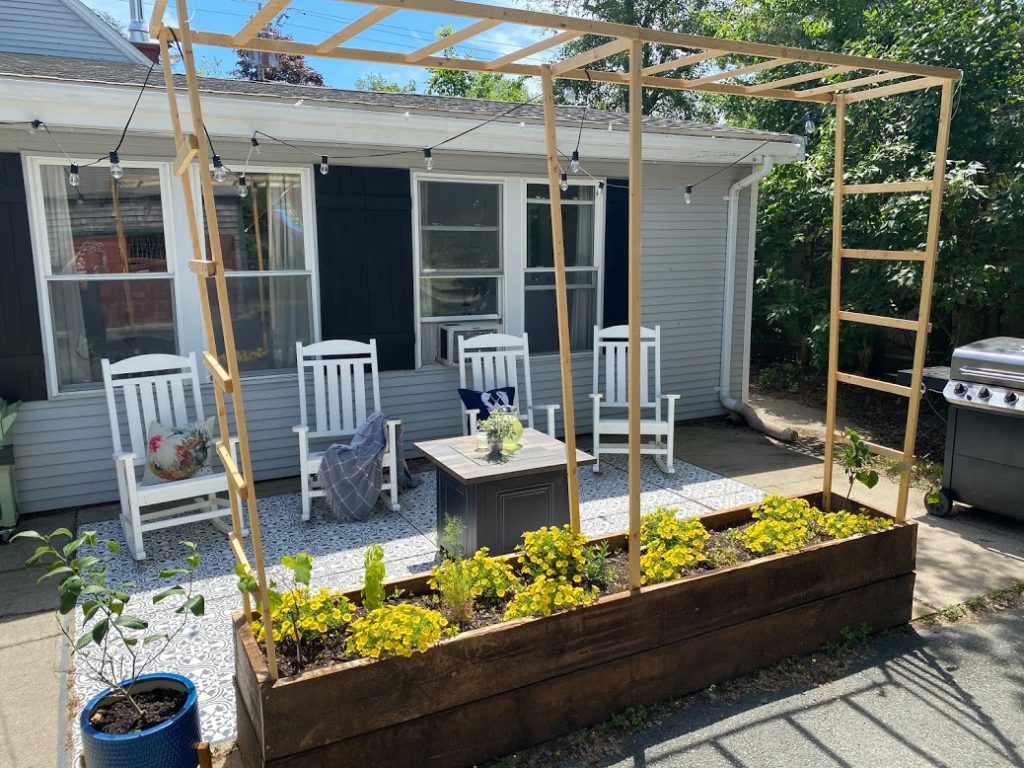
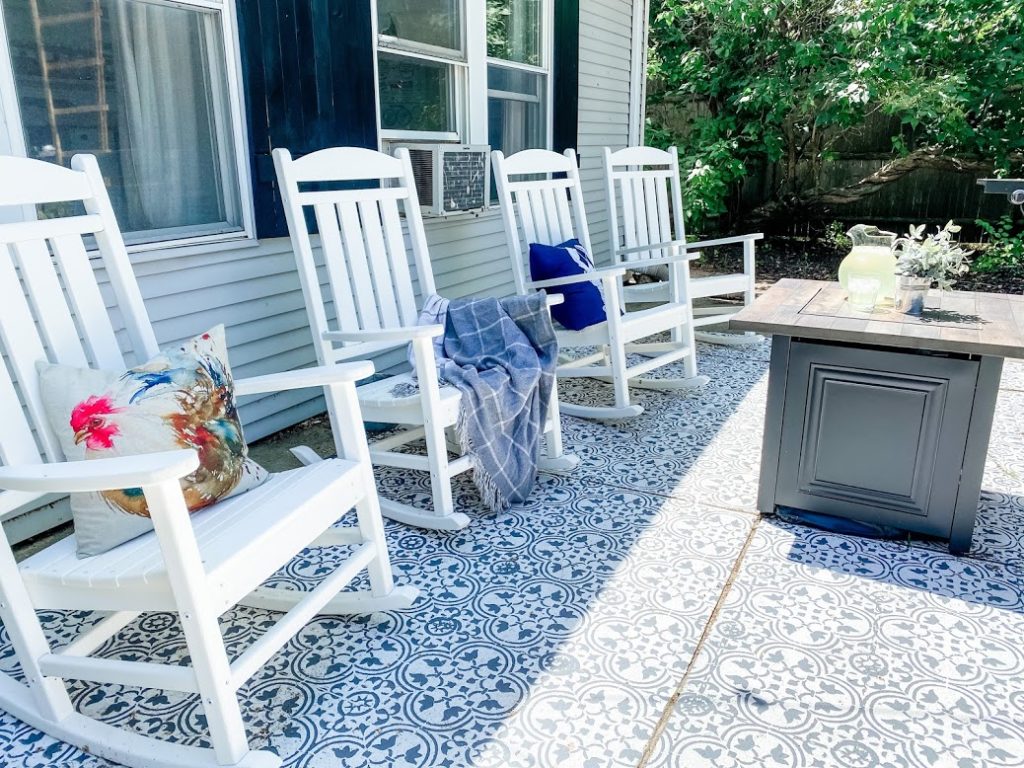
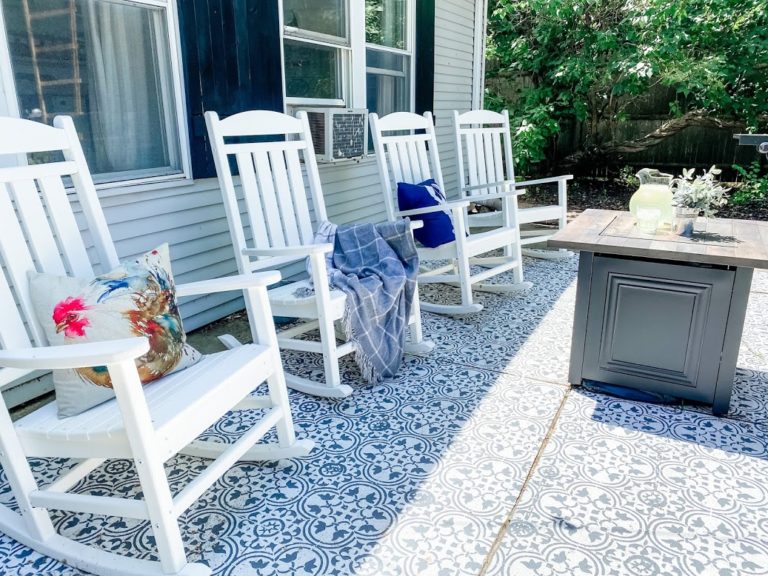
To further define the patio space, I decided to stencil a “rug” onto the concrete. Little did I know how time consuming this would be! First, I tapped off the rug area and rolled on a white concrete paint. Then I “just” had to stencil the whole area with a blue concrete paint. It took me probably 7 hours over the course of a couple days to do all the stenciling. My back and legs were unhappy with sitting on concrete for that long but I am SUPER happy with how it came out! click here to learn more about how to stencil a concrete patio
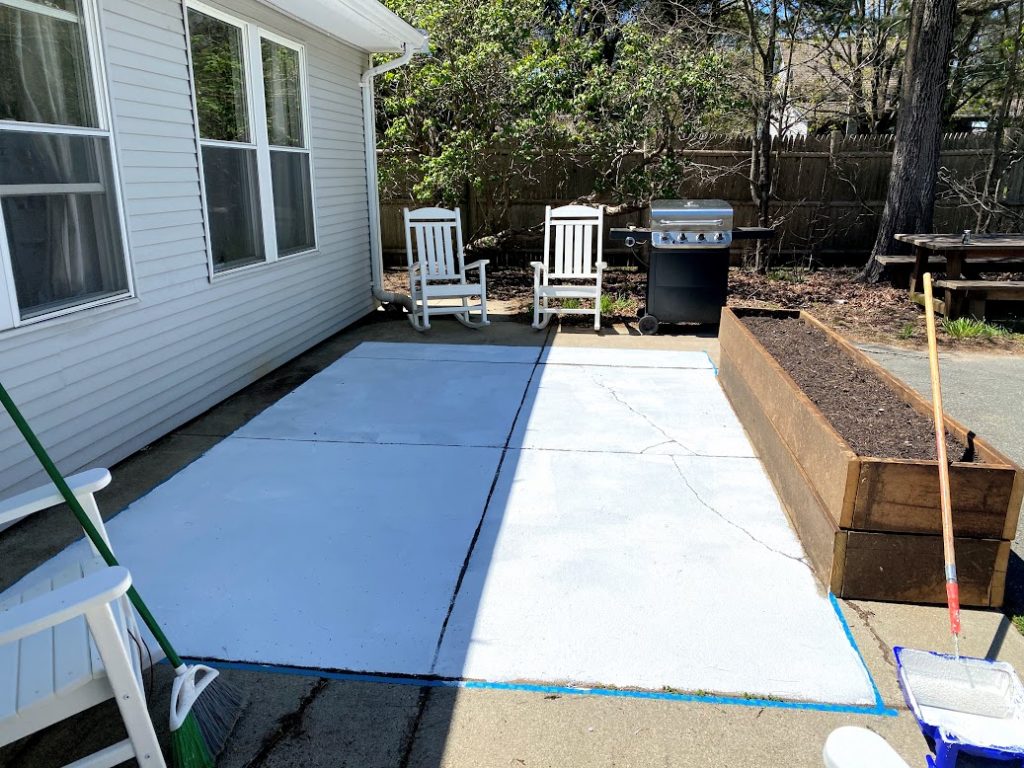
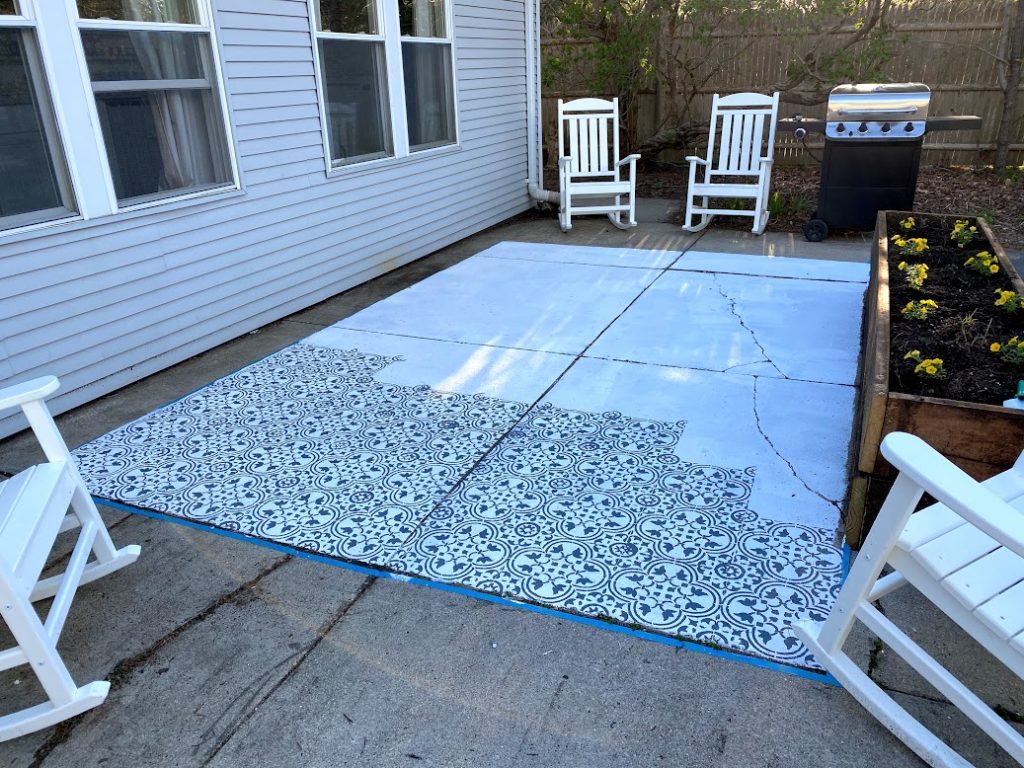
With the “rug” done it was time to add in the furniture! We got four comfortable and durable rocking chairs. I looked for ones with straight lines on the back to compliment the white railing on the other side of the door. They are made from recycled plastic so can be easily cleaned, won’t splinter or need painting, and should last for a long time. We also added a propane fire table. Also nice and easy – no chopping wood or stoking a fire. I wanted this patio to be just about relaxing!
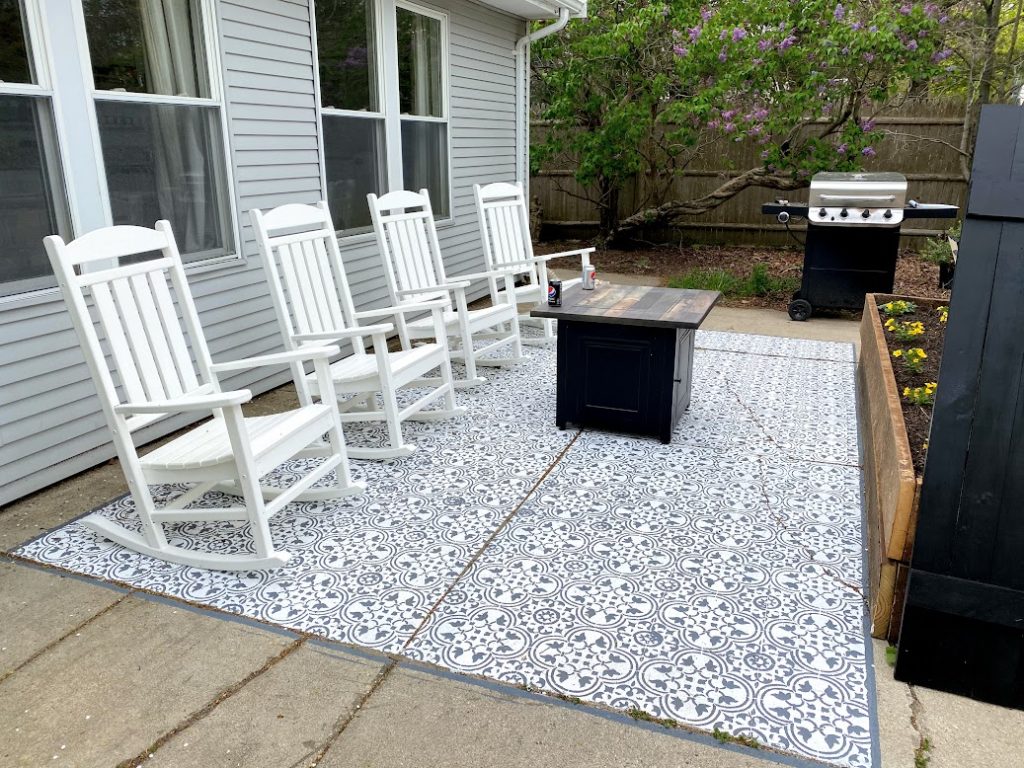
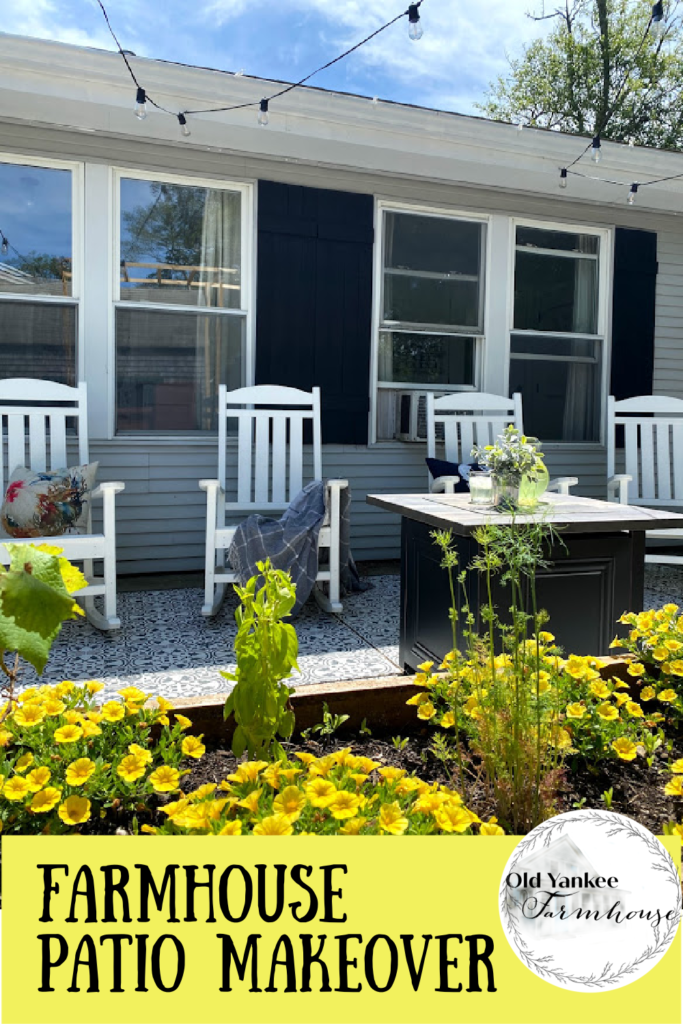
Next up, those big empty windows by the patio were just crying out for some shutters. And while we were at it, adding shutters to the small windows on the second floor would help them feel a bit more substantial. We decided to build the board & batten shutters ourselves to go with the farmhouse style of our home. It’s a super easy style to DIY, it’s basically just cut to fit your windows and add the cross beam to hold them together. At some point I’d like to add shutter hardware to make them look more dimensional & historic, but for now we just screwed them right to the house as non-functional shutters. I decided to paint them black to bring down some of “cutesy” factor with the busy stenciled rug and bright blue door.
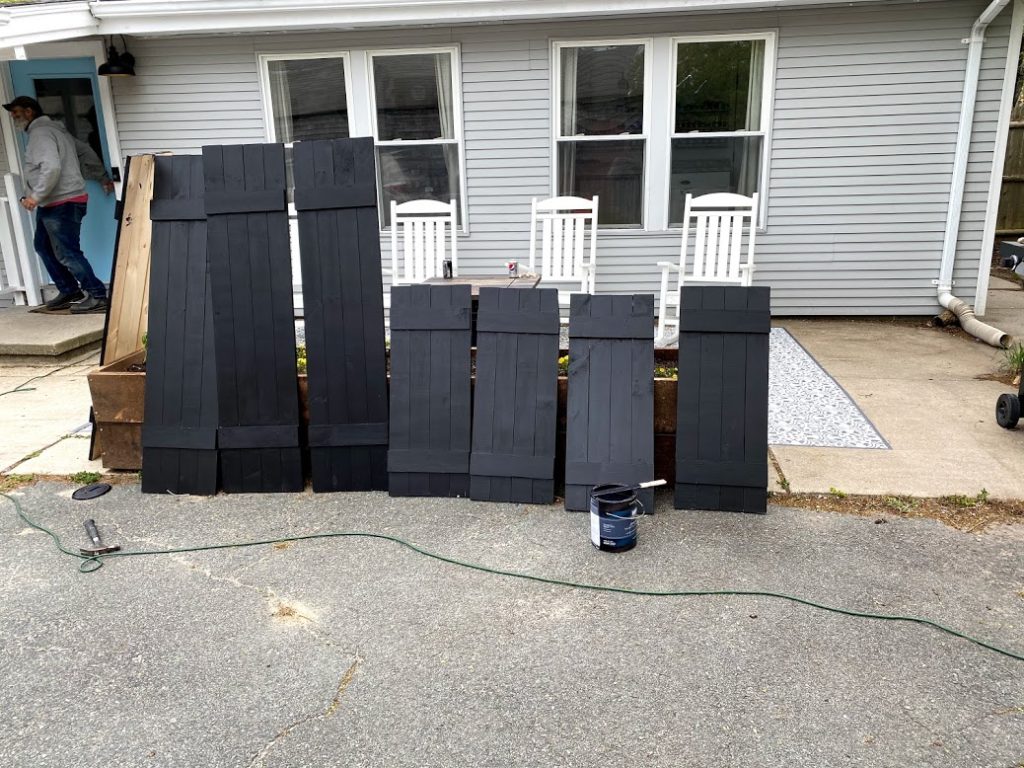
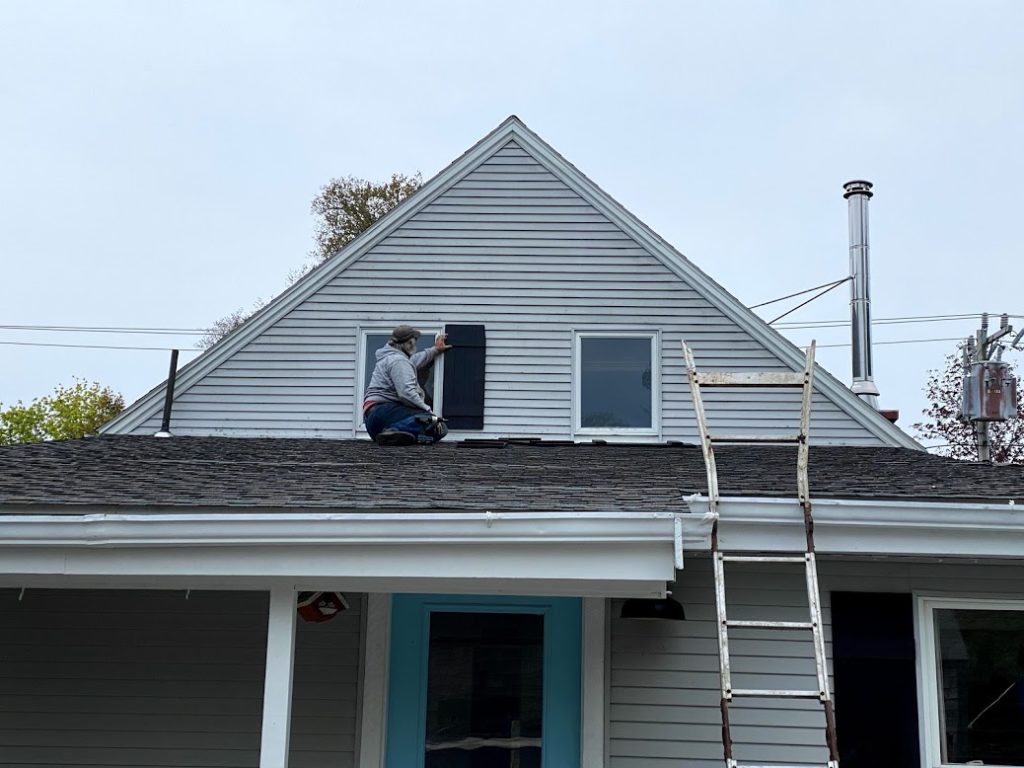
My amazing husband even climbed up on the roof to install the second story shutters – despite not being a fan of heights.
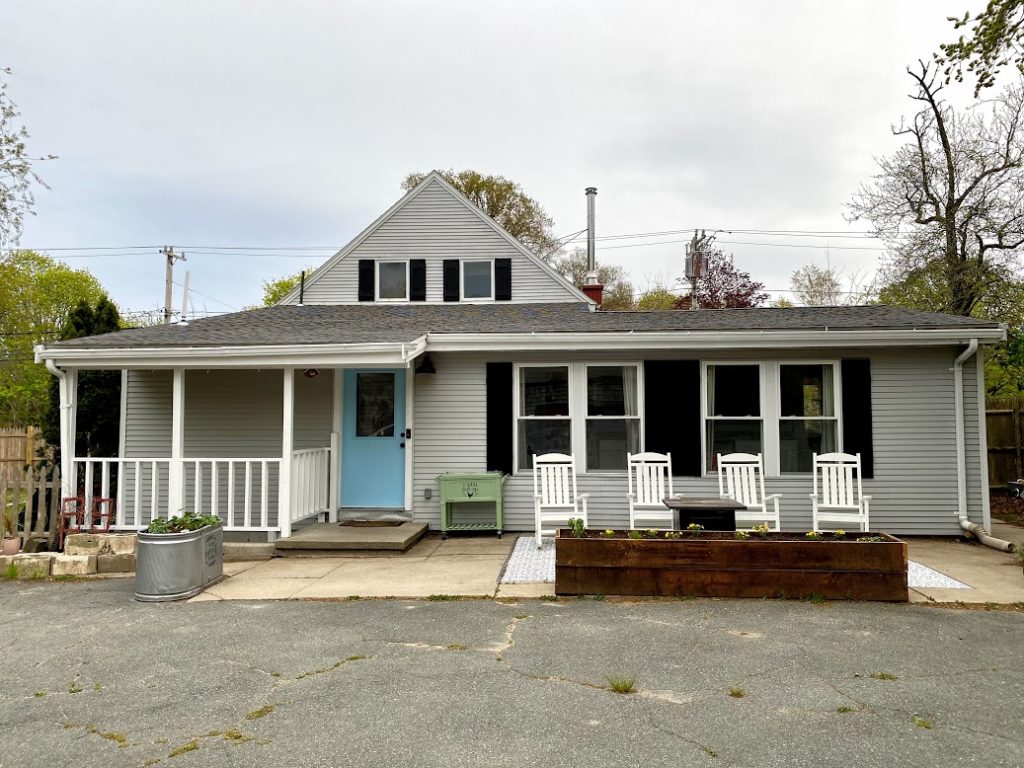
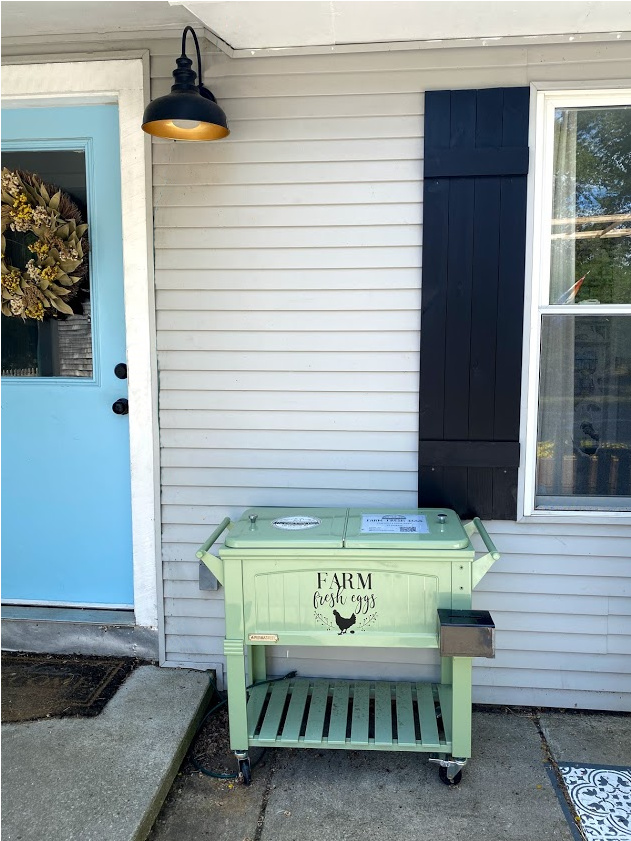
LOVE the shutters – they really made the back of the house feel finished. We replaced the light next to the door – it was just a basic floodlight doing nothing for the curb appeal. We found a nice black barn light on Wayfair. I also decided it was time to upgrade our old egg cooler. We sell chicken & duck eggs when we have extras. I switched out our old Rubbermaid cooler for a nice patio cooler with wheels. It’s huge! I can fit so many eggs in it and it has wheels to move it easily to the roadside (it also doubles as an awesome party cooler!). I screwed a little honor system money box to the front and added a cute “Farm Fresh Eggs” decal to the front. Love it!
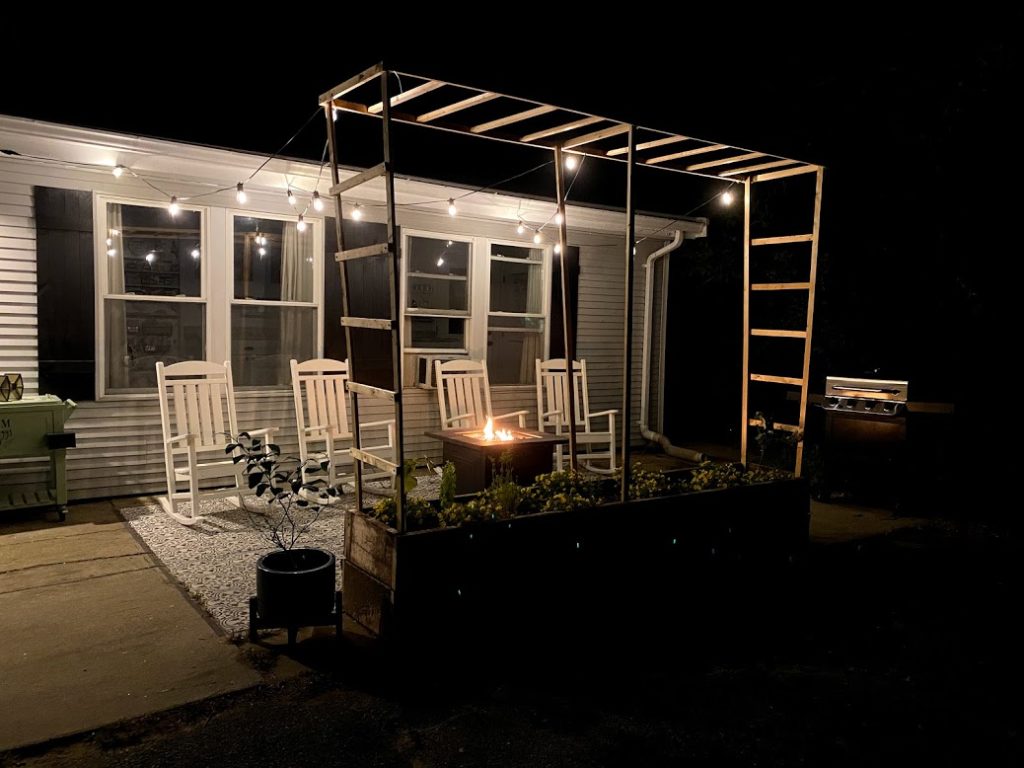
While at the nursery shopping for plants for the patio planter I came across grape vines. We had grapes at the old house and I had been trying to figure out where we could plant them here. Suddenly my patio planter was turning to an arbor in my head! I bought two grape vines and ran to the lumber store. Before you knew it we had a simple arbor. In a couple years this is going to look awesome with the grapes growing over it!
Seeing the arbor in place gave me one final idea – we needed string lights overhead for nighttime get togethers! I am so happy with the results, and the patio is already getting TONS of use. Sitting out here rocking away is an amazing break while gardening or just a nice way to end the day! I can watch my garden grow and the animals poking around in the upper yard while rocking in my chair, sipping a cold drink….this is the farm dream I never thought I’d get to realize!
Here’s one final before and after and then some of my favorite shots of the final project!

Wow looks great! We had basically a front yard of turf, flowers beds filled with gravel, not very appealing either. We ditched the gravel and started planting. Love the stencil and the shutters! Looks like you have some shade, a must have. You’ll make lots of memeories there 🙂
Thank you! We are really enjoying it!
Wow, your patio looks awesome!!! Great work.
Enjoy, Janie
Thank you! It’s so nice to have somewhere to relax outside!